
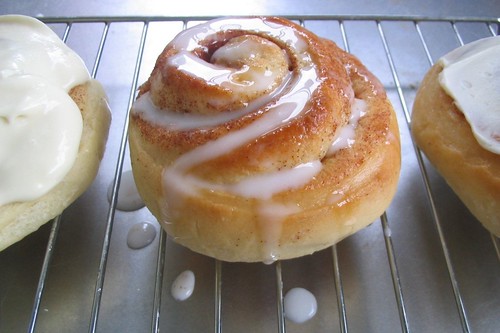
(From left to right: Maple Cream Cheese Frosting, Icing, Cream Cheese Frosting)
Did you know Cinnabon first started as a single bakery in a Seattle area mall? I guess that's another overprice chain (Starbucks I am looking at you!) that Seattle is responsible for spreading to the rest of the world. (Don't worry Seattle, I still love you) It was the perfect excuse to put the trusty stand mixer to work when Marce picked cinnamon buns and sticky buns for this month's DB challenge. Mmm... I can smell them already!
I love working with sweet bread doughs. This is maybe because my very first yeasted baked good (other than the foolproof no-knead bread) was a batch of pecan sticky buns. Those fluffy and gooey sticky buns helped me overcome my fear of yeast. Active dry yeast intimidates me; the proofing, hoping the water isn't too hot, fearing my yeast is dead, wondering if the weird yeast brew ready, was enough to deter me from baking bread for years. But instant yeast changed all that. It's great to work with, no proofing, no guesswork, just toss it in with the dry ingredients and it'll do its thing. I love the soft supple feel of sweet bread doughs, they're more tender than the average flour, water, yeast, salt bread doughs, and their gentle buttery aroma. Sticky buns, brioches, challah, and the likes hold a special place in my heart.
This month, I wasn't the only one excited for the challenge. Steven L-O-V-E-S sticky buns. I found it absolutely endearing to see him so excited, asking me when I'm going to make those sticky buns. Sticky buns are now a morning staple and it's even encouraging us to eat breakfast everyday! Hooray!
I have to say that this challenge was the easiest of the DB challenges I have completed so far.
Now lets get into the recipe.
The allowed modifications to the recipe were:
- You can use any spice mix you'd like, ginger, allspice, cardamom, etc. But I chose to keep it simple with just cinnamon sugar.
- You can do cinnamon buns or sticky buns or both.
- Nuts are optional
- Can substitute another dried fruit for raisins in sticky buns.
Cinnamon Buns & Sticky Buns
Adapted from Peter Reinhart´s The Bread Baker´s Apprentice
Days to Make: 1: 15 minutes mixing; 3 1/2 hours or longer fermentation, shaping and proofing; 20 to 40 (mine were done in 15 - 30) minutes baking
Yield: Makes 8 to 12 large or 12 to 16 smaller cinnamon or sticky buns
Dough
6 1/2 Tbsp (3.25 ounces) granulated sugar
1 tsp salt
5 1/2 Tbsp butter
1 large egg
1 tsp grated lemon zest
3 1/2 C AP flour (I think AP flour makes them more tender than bread flour)
2 tsp instant yeast (I have a big jar of yeast but if you had a 2 1/4 packet of yeast you can use the whole thing)
1 1/8 to 1 1/4 C buttermilk at room temp
Cinnamon Sugar Filling
6 1/2 Tbsp granulated sugar
1 1/2 tsp cinnamon (or your own combo of spices)
1 Tbsp melted butter (my addition)
White Fondant Glaze for Cinnamon Buns
1 C powdered sugar
1 1/2 to 2 Tbsp warm milk
Caramel Glaze for Sticky Buns
1/4 C granulated sugar
1/4 C firmly packed brown sugar
1/4 tsp salt
1 stick unsalted butter at room temp
1/4 C corn syrup
1 tsp vanilla extract
Nuts and fruit of your choice: pecans, walnuts, raisins, etc. (I used 3/4 C pecans)
Note about yeast: Instant yeast is also called perfect rise, rapid rise, fast rising, and bread machine yeast. Different names but they're all instant yeast. It is dried differently from active dry yeast and as a result it requires no proofing, can be added to your dry ingredients, and goes to work faster. I like to keep my yeast in the freezer so it lasts longer. (Here's a link about yeast: Understanding Yeast)
Cream the butter, sugar, and salt with a hand mixer, or paddle attachment of a stand mixer, or by hand. Add the egg and lemon zest and beat until smooth, be sure to scrape down the bowl often. Start by adding 1 1/8 cups of buttermilk, the flour, and yeast. Mix on low speed until the dough comes together then switch to the dough hook if using a stand mixer.
Increase the speed to medium and knead for about 10 minutes (or 12 - 15 by hand). The dough should be silky and supple and somewhat tacky but not sticky. If you're using a stand mixer, as the dough is kneading on the dough hook, it should stick to the divot in the bottom of the bowl. If the dough is sticking to the sides of the mixing bowl, it is too wet and add a bit more flour until it clears the sides of the bowl but still sticks to the bottom. However if the dough is not sticking at all to the bowl, it is too dry, so add a little buttermilk and continue kneading.
Coat a large bowl with oil then roll dough around in the bowl to coat with oil. Cover with plastic wrap and let it rise at room temperature until the dough doubles in size, about 2 hours.
My tip of the day: I have a large 2 quart pyrex measuring cup that I always use for rising dough. The markings on the side are perfect for knowing exactly when dough has doubled. In a large bowl, it's hard to tell just how large the dough should be.
Also, always make sure the dough has doubled, do not stop the rising short because the recipe says about 2 hours. Kitchen temperatures vary and it can depend on the kind of yeast you use and how old it is. Just be patient and let the yeast do its job. My dough took almost 3 hours. However, if after an hour or 2 your does not look like it's rising at all, the yeast may be dead and you'll need to make another dough with newer yeast.
After the dough has doubled, lightly flour your work surface. Roll out the dough to a large rectangle. If you are making large buns, roll it to about 2/3 in thick and 14 in by 12 in (8 to 12 buns). For smaller buns, roll it out to 18 in by 9 inches (12 to 16 buns). Keep the dough thick, if you roll it out too thin, it will be tough and chewy instead of soft and fluffy after baking.
Sprinkle the cinnamon sugar over the surface of the dough and roll the dough up very tightly into a long cylinder. I had a problem of keeping the cinnamon sugar on the dough as I rolled and sliced them. The best trick (I learned from Cook's Illustrated) is to melt a tablespoon of butter and mix it with the sugar, forming a sandy mixture. Then you can press the sandy sugar onto the dough and it will stay put. After rolling, pinch the seam shut. The middle will be a little bigger than the ends, so gently roll it so the log evens out.
Cut the buns into 8 - 12 pieces for large buns or 12 to 16 pieces for smaller buns. Sometimes the 2 end buns are really tiny, so I unroll one and reroll it around the other. This makes a bun that's the same size as the rest but you end up with 1 less bun that you cut. The first time I made this recipe I ended up with 15 buns total, 9 sticky buns (3 by 3 in an 8 in baking pan) and 6 cinnamon buns. If you are making a full recipe sticky buns (9 x 13 pan) cut the log into 15 pieces so you can do 3 by 5 buns in the pan.
Here is where the recipe diverges depending on which buns you want to make.
Cinnamon Buns (Sticky Bun Instruction to Follow)
For the cinnamon buns, line a sheet pan with parchment paper. Place the buns so that they aren't touching but somewhat close to each other, and cover with plastic wrap.
Preheat the oven to 350°F (175°C). Bake cinnamon buns on the middle shelf. Cinnamon buns will bake for about 15 - 20 minutes. (Most DBs found that the buns baked faster than the recipe suggests which was 20 - 30 minutes for cinnamon buns).
Let the buns cool until they are warm but not hot before serving, about 10 minutes for cinnamon buns.
Make the fondant glaze for the cinnamon buns. Whisk the warm milk in with the sugar until a thick paste forms, add more milk if you need to. Drizzle over warm buns to serve.
Sticky Buns

For the sticky buns, make the caramel glaze, beat the 2 sugars and salt with the softened butter in a mixer. Then add the corn syrup and vanilla extract and beat until light and fluffy, about 5 minutes. Spread about 1/4 in of the glaze on the bottom of a baking dish. This will make enough for a 9 x 13 pan. Since I used an 8 x 8 pan, I halved the recipe (2 tbsp sugar, 2 tbsp brown sugar, 1/2 stick butter, 2 tbsp corn syrup, 1/2 tsp vanilla).
After you have prepared your pan with the glaze, sprinkle your dried fruit on the glaze if using, then place the sticky buns (pretty side down, since they will be turned upside down after baking) on the glaze. Cover with plastic wrap. I don't like to add my nuts at this point because they will get steamed and softened baking under the dough. The best way to keep them crisp is to toast them separately and sprinkle them on the buns before serving.
Let the buns rise for a second time, for about 75 to 90 minutes, until they have grown into each other.
Preheat the oven to 350°F (175°C). Bake sticky buns on the lowest shelf. Sticky buns will take about 20 to 30 minutes. (Most DBs found that the buns baked faster than the recipe suggests which was 30 - 40 minutes for sticky buns). Keep an eye on the sticky buns, if the glaze overbakes it will harden into a candy-like substance rather than stay a gooey caramel. By using a glass baking dish, you can easily monitor the color of your glaze. You can also take a knife and gently slide it under a bun and peak at the consistency of the glaze. It will depend on your oven and take a little practice to know when they are done.
Meanwhile, toast your pecans in the hot oven as the buns bake. Let them cool then roughly chop.
Let the buns cool until they are warm but not hot before serving, about 20 minutes for sticky buns. Flip them onto your serving pan, add your chopped toasted pecans, and spoon any run off glaze or any glaze remaining in the pan, on top of your buns.
***
Additional Recipes & Variations
I personally prefer cream cheese frosting on my cinnamon buns so here are some recipes for cream cheese frostings.
Cream Cheese Frosting
1 bar, 8 oz. cream cheese
2 Tbsp melted butter
1 tsp vanilla
1 C powdered sugar
Whisk everything until smooth. This will make enough frosting for 1 full batch of cinnamon buns.
Maple Cream Cheese Frosting
1 bar, 8 oz. cream cheese
3/4 C to 1 C maple syrup
Whisk everything until smooth. This will make enough frosting for 1 full batch of cinnamon buns.
Cinnamon Brown Sugar Variation
Replace the granulated sugar in the cinnamon sugar with packed brown sugar.
Maple Sticky Bun Variation
Replace the corn syrup for maple syrup in the sticky bun caramel glaze

***
Just for fun, I decided to do a comparison between this sticky bun recipe and the recipe from Cook's Illustrated, which you can find here.
The Dough
Bread Baker's Apprentice
3 1/2 C flour
1 1/8 C buttermilk
1 large egg
6 1/2 Tbsp sugar
5 1/2 Tbsp butter
2 tsp instant yeast
1 tsp grated lemon zest
1 tsp salt
vs.
Cook's Illustrated
4 to 4 1/4 C AP flour
3/4 C buttermilk, room temp
3 eggs, room temp
3 Tbsp granulated sugar
6 Tbsp melted butter
2 1/4 tsp of yeast (1 packet)
1 1/4 tsp salt
Comparisons:
The CI version makes more dough, since it uses more flour. It uses more egg and more butter, but less sugar. The yeast is about the same and the lemon zest can be omitted or replaced with some vanilla extract.
In the CI recipe, a loose batter is made with the eggs, buttermilk, and melted flour then the flour is added. In the Bread Baker's Apprentice recipe, the butter is creamed with the sugar in the first step of this recipe. Both are very easy methods to make the dough. I would have to say I preferred this recipe. I'm a big fan of buttermilk so I liked that this recipe used more of it. However since the CI recipe used more egg and butter, those buns are a bit richer and more brioche-like.
Caramel Glaze
Bread Baker's Apprentice
1/4 C sugar
1/4 C brown sugar
1 stick butter
1/4 C corn syrup
1 tsp vanilla
1/2 tsp salt
vs.
Cook's Illustrated
3/4 C brown sugar
1 stick butter
6 Tbsp corn syrup
2 Tbsp heavy cream
1 tsp vanilla
1/4 tsp salt
Comparisons:
No major differences other than the CI recipe used a lot more sugar and a bit more corn syrup. The only major difference is that the CI recipe separated the glaze into 2 parts. About 2/3 was baked with the buns and 1/3 was made separately to spread on top of the buns before serving. Sure it makes the buns gooeyer but again like with many CI recipes, it's an extra step and more work. Also the Bread Baker's Apprentice book called for beating everything together and the CI recipe melted everything together. Not that big of a difference.
Overall:
So which recipe is better? CI touts that their recipes are always the best version since they test dozens and hundreds of different recipes to come up with their own. But in many cases, the recipes end up a little fussy with extra steps that can be avoided. I would have to say that the two recipes are really comparable. The only major difference is in the dough. The CI recipe is richer and more brioche-like but both doughs are beautifully soft and supple and a dream to work with. So it doesn't matter which you choose. Personally I liked this recipe more because the steps were more straightforward and I like using lots of buttermilk in my baked goods.
***
Whew that was a long post! I want to thank Marce for picking such a great recipe. Now go and check out my fellow DB's experiences this month.

37 comments:
Great job on this months challenge. I agree that CI can be a bit "step involved" (I type this as I just put a batch of their blondies in the oven...35 minutes after starting the recipe) Again, great job on the challenge this month.
I still love my over priced Pumpkin Spiced Latte though.
Though I didn't know about the Cinnabon! Good to know.
Great job on your buns.
WOW! What a great job!
If you have BBA book, the author actually suggests Poor Man Brioche dough if you want the dough to be richer... I personally find that BBA dough is good. But thinking back, last time I made it, the result was better and richer. You know why? I used premium butter Lurpark for the dough and it DID make the difference!
But I so love my guilty pleasure of an occasional starbucks latte!
Your buns turned out gorgeous, and the pictures are beautiful!
Oh my gosh, those buns look amazing. It's absolutely torture reading the posts of the Daring Bakers this month -- because I love love love cinnamon buns.
I loooove the idea of maple cream cheese icing. It would go great with the maple cream black tea I have!
Fantastic job this month! I think we all kicked Cinnabon's buns!
Ohhhhhh! Look at the drips of glaze. Ohhhhhhhh! Well done!
You're the first I've seen who has spread the glaze on the warm rolls.. I heart you. :) Now THAT'S the way to frost a cinnamon roll!
Beautiful post - love the comparison!
xoxo
It looks like nobody had the problems with rolling the dough that I did. Yours are so tidy, and they look beautiful!
Oh, gosh, the buns look so good, the perfect texure and size...and I love the variations you suggested. :-) Loved the post and the enticing photos!
That's such a perfect roll in the shot...love the shape, the glaze, everything!
Simply gorgeous! Great job on the challenge this month. They look so wonderfully delish!
I made cinnamon rolls today too! :)
Your buns look gorgeous! Great job!
Glaze on warm rolls! YEah!! Love the frosting variations and wtg trying another dough! THey look fabulous!
Someone else mentioned a maple cream cheese frosting, so I'm really glad you included a recipe for that! Your buns look great!
I like the fact you did a comparison, thank you! Glaze on hot buns is soooo good.
Tip of the month for sure, especially if you're worried if your dough is doubled. (Or you could use a clear plastic container with straight sides and mark with a felt pen).
The buns look fantastic and it was very interesting to see the recipe comparison.
Great post!!! Thanks for all the great variation ideas! My grand mother and mother always made cinnamon buns with the cream cheese topping. The maple and cream cheese topping sounds nice. I really like the idea of using maple syrup in the sticky buns.
your first/second bread-making experience... you are REALLY GOOD!!! And I love to read your comparasion, ok, I will head to CI too! Million thanks *kiss kiss*
Oh they look so wonderful! and once again I wish I could have eaten the icing, but I love all your variations. I don't have the book, but you're making me want to run out and buy it. Your first picture is mouth-watering.
Your buns look so perfect and happy! Yay for happy buns!
wonderful post and the buns looks perfect!
Great cinnamon buns. I could never get mine right.
They look fantastic. I love how you experimented with so many different icings. The cream cheese one sounds delicious.
Nice bunz! Great job rolling the dough. I wasn't able to roll mine as tightly as I want to :)
Oh Amy, these buns look beautiful.How did you shape them so perfect? I love that first picture...so appetizing!
Oh all you daring bakers are just so talented! I want a cinnamon bun like crazy!
Thanks again for all the encouragement and sweet comments everyone. I always look forward to the day when we take over the food blogosphere. *mua hahaha* Can't wait to get started with this month's challenge. xoxo
Mary,
I still love all of CI's recipes though. They really appeal to the science geek in me. :)
Peabody,
I can't get enough of the green tea fraps. I didn't know about Cinnabon until I wikied it. :D
Anh,
I'm really considering getting this book, it sounds amazing. Good butter does make a big difference.
Slush,
Thank you!
Lydia,
Me too! Nothing like a cinnamon bun to wake me up in the morning, or as a midnight snack. :)
Jenny,
The maple cream cheese icing was good enough to eat with a spoon. Yummy. :)
Chris,
I agree! Cinnabon has nothing on the DBs. :)
Ivonne,
Thanks! Icing drips yummm.
Lis,
Warm buns is the way to go. :D I was really generous with the cream cheese frostings because I love cream cheese. You could hardly see bun underneath. Lol.
Aoife,
Aw thanks. But the two ends of the log were really miserable, the log was actually very tapered and the sizes of my buns varied tremendously. :P
Belinda,
Thank you!
Anita,
Thanks! That was the prettiest bun, the rest weren't as evenly browned or as evenly rolled/spiraled. hehehe *it's a secret*
Meeta,
Thank you!
WC,
Long lost blogging soul mates you and I. :)
Rosa,
Thank you!
Helen,
Thank you!
Deborah,
Lol it wasn't much of a recipe since it was just cream cheese and maple syrup but it sure was delish. :)
Karen,
Ooh the felt pen trick is a good one!
Marce,
Thanks again for the awesome recipe.
Kevin,
The sticky buns were so sinfully delicious. :) I really prefer a cream cheese topping over regular icing, I love that tang.
Gattina,
Aw thank you! I've made sweet doughs a few times now and I really like it.
Hilda,
Thank you! I really want to get the book too. :P
Mehgan,
Thank! Yay happy bun!
Anne,
Thank you.
Pamela,
Thanks!
Katie,
Thank you!
Marcia23,
A lot of my cinnamon sugar fell out because I wasn't able to roll them tight enough either. Oh well.
Veron,
Most of them didn't look as good as the one in the picture. Lol.
Hillary,
After seeing so many buns, I don't blame you. :)
Beautiful buns! I've never had them with cream cheese frosting, but it sounds good! I appreciate your CI comparison, too. I do like a lot of their recipes and enjoy the magazine along with America's Test Kitchen, but some of their recipes do seem to have a few extra steps here and there.
But... but... but... I LOVE my Friday morning caramel macchiatto! Which thanks to you I'll be pairing with a maple-frosted cinnamon bun in the morning. Sensational combination!
I like the way your icing drizzles its way down the swirly bin of the buns. Greta idea about the different icings, too!
them some FAT buns!
that will be the only time I can say that to another woman without getting smacked.
I made these last night--really delicious! Initially, ran into some problems with the first rise (took 12 hours), but realized that the yeast I use needs to be proofed, first. Nothing hurt by a slow rise--very yeasty counterpoint to the sweet toffee topping.
I made these today and it worked out pretty well. Thanks so much for the recipe. As a side note, I substituted yogurt for buttermilk and the buns still rose beautifully (albeit much more slowly). I have one question though - is there some way to keep the outside of the bun tender and soft when I bake it? The outside seems to be getting dry/crunchy before the bun even has a chance to brown. Do you think turning down the temperature a shade would help? thanks!!
Hi Michelle,
I think turning down the temp would most likely help. You can also try covering the dish with some foil for maybe half of the baking time and then removing it so the buns can brown but I've never tried this. I'm glad to hear the yogurt substitution worked well.
Post a Comment