Friday, February 29, 2008

Pork, Shrimp, and Shiitake Mushroom Potstickers

Pork Shrimp and Shiitake Potstickers

Dumpling making was a frequent weekend family activity when I was young. First, my dad would mix the filling, adding a splash of this and and a dash of that. Then we would start the assembly line. My brother's job was to separate any wrappers that were stuck together, lay them out, and, the most important part, place them flour side down so when we pick up the wrappers, the flour side would end up on the outside of the dumplings. My mom and I would wrap the dumplings, using up the wrappers as fast as my brother could separate them. Dad would help with the wrapping sometimes but his other job besides making the filling was boiling the dumplings. Of course, my mom would always get on his case about how he would boil them too long.

The way Chinese people boil dumplings has always puzzled me. Here’s how my family did it:
1. Bring a large pot of water up to a boil
2. Add your dumplings, bring it up to a boil again
3. Add a cup of cold water, boil again,
4. Add another cup of cold water, and after it comes up to a boil again, they are ready to be served.

Every Chinese person I’ve asked about this says the same thing: add water, boil, add water, boil. Even all of my Chinese cookbooks say to boil this way. Nowhere does it specify how much water you start out with or how much is a “cup” of cold water, sometimes my dad used a mug, sometimes a bowl. Because I'm a food science nerd, I wonder, what is the science behind the principle of adding the cold water? I could BS something and say that the cold water solidifies the gluten in the wrappers making the dumplings chewier but honestly, I don’t think a cupful of cold tap water in a stockpot of boiling hot water is going to make a difference. What's the difference is between doing this versus a steady gentle simmer? Anyone want to hazard a guess? Anyways, since I like to be precise, or at least try to, I gave time frames for boiling, steaming, and panfrying the dumplings. You can always cut open a sacrificial dumpling to check if the inside is cooked through.

My family always used storebought wrappers for their convenience so I thought these were the way to go. The last time I tried to make homemade wrappers, I ended up with some painful and diastrous results (I won’t go into details). So I went back to buying my wrappers, thinking that they would solve my problems. But... they don’t! Now I find that the storebought wrappers are too dry and rigid. Having to wet the wrappers with water is an extra step and it's especially annoying when the wrappers don't seal properly. Homemade wrappers definitely taste better and have a much better chew but is it worth the trouble? I’ll have to try again.

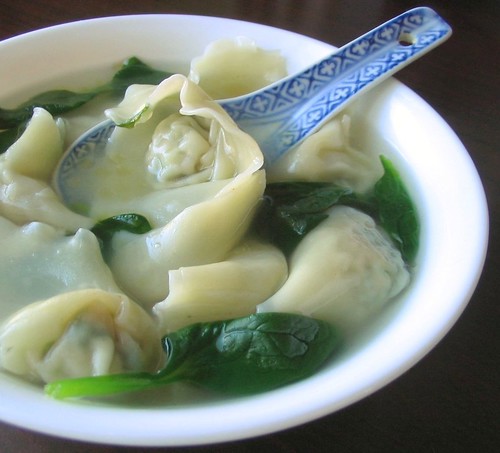
With so many possible fillings and three different ways of cooking them, I'll never get tired of making and eating dumplings. Dumpling or jiao zi are filled with a combination of protein and veggie. They are usually filled with ground pork because that is the most common meat eaten in China, but they can also be filled with shrimp, beef, pressed tofu, or even scrambled egg. There's even greater variety of vegetables you can use: napa cabbage, salted mustard greens, Chinese chives, etc. Then you can either boil the dumplings (shui jiao) or steam them (zheng jiao) or panfry them (guo tie/potstickers).

Pork, Shrimp, and Mushroom Potstickers

1 lb ground pork
1/2 lb shrimp, finely chopped or briefly pulsed in a food processor
1/2 C chopped shiitake mushrooms
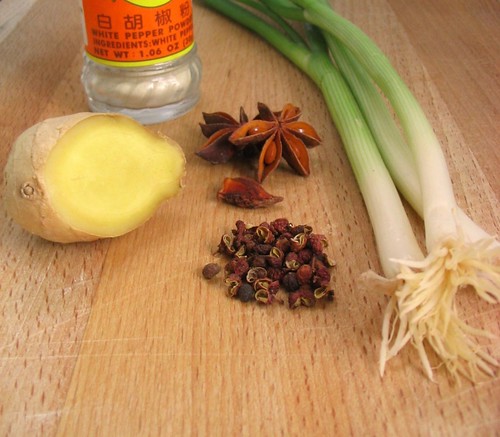
1 tsp grated ginger
2 Tbsp Shao Hsing rice wine
2 Tbsp soy sauce
2 tsp sesame oil
1/4 tsp white pepper
1/2 tsp sugar
1 egg
1 Tbsp cornstarch

1 pack of potsticker wrappers or fresh wrappers
And a bowl of water

or

Fresh potsticker wrappers
3 C all purpose flour
2/3 C boiling water
1/3 C cold water
1 tsp salt

Makes about 32 to 36 potstickers

Make the wrapper (optional)
Mix flour, salt, and hot water. Stir together with a spoon or pair of chopsticks until the dough comes together. Add the cold water and stir. Knead until smooth. The dough should not be sticky. Let the dough rest at least 30 minutes. You can make the filling at this time.

Divide the dough in 4 pieces and keep 3 pieces under cover so it doesn’t dry out. Take one portion and roll it out into a long snake. Cut off a piece of the snake to and roll it into a 3 in wrapper. Ideally it should be thinner around the edges and thicker in the middle.

Repeat for the other half of the dough. Keep the dough covered when you work with out to prevent it from drying out.

Make the filling
Mix all of the ingredients for the filling together in a bowl.

If you're using storebought wrappers, make sure you place the filling on the side with less flour. Place a tablespoon of the filling on a wrapper. You can pleat the edges or fold them in half. If I’m boiling them, I get lazy and fold them in half. If I’m panfrying them for potstickers, then I like to pleat them so they can sit neatly on their flat bottoms in the pan. When using storebought wrappers, make sure to have a bowl of water to moisten the entire perimeter of the wrapper in order to tightly seal the dumpling. You won’t need the water for fresh wrappers since the dough is soft enough to seal together nicely. If you’re looking for how to pleat the dumplings, the very best folding guide I've come across is Jen’s dumpling guide. I didn’t even bother taking my own pictures especially with my dirty hands because Jen’s guide is an A+. There was a good one on Epicurious a while back but I can’t find it anymore. Place the wrapped potstickers on a lightly floured tray and keep them covered until you are ready to cook them.

Boil:
Bring a large pot of water to a boil. Add the dumplings and stir so they don’t stick to each other or to the bottom of the pan. Cover and lower the heat to a simmer. Simmer for 7 – 9 minutes, or until the filling is cooked through. Frozen dumplings will take an additional 1 – 2 minutes. Drain and serve with dipping sauce.

Steam:
Bring the water in the steamer up to a boil. Place some cabbage leaves or a layer of cheesecloth in the steamer. Arrange the dumplings so they are not touching. When the water in the steamer comes to a boil, steam the dumplings for 10 - 12 minutes. Frozen dumplings will take an additional 1 – 2 minutes.

Pan fry:
Heat 1 tablespoon of oil in a nonstick skillet over medium high heat. Arrange the dumplings in a circular ring around the pan and squeeze some into the middle, making sure that they do not touch. Pan fry until the bottoms are light golden, about 1 minute. Add 1/2 C of water and immediately cover. Turn the heat down to low or medium low and steam the dumplings in the skillet for 10 minutes (12 minutes for frozen). After 10 minutes, remove the lid and turn the heat up to medium high to evaporate any remaining water and crisp the bottoms, about 2 – 3 more minutes. Place a plate over the potstickers and invert the pan to serve the potstickers crispy side up.

Freeze:
Freeze the dumplings on a lightly floured tray, making sure they are not touching. When they are frozen solid, transfer them to a freezer bag.


Dipping sauce

2 Tbsp soy sauce
1 Tbsp rice vinegar
1/4 tsp sugar
1/4 tsp toasted sesame oil
Thinly sliced scallions (optional)
Minced ginger (optional)
Minced garlic (optional)
Chili oil or chili sauce/paste (optional)

Mix everything in a bowl and serve with dumplings. Double if needed.

Monday, February 25, 2008

Wonton Soup

Wonton Soup

The best wontons I've had were made with pork and ji cai, or shepherd's purse. You're probably thinking, "what the heck, that sounds like a weed". And according to wiki, yeah basically it is a weed. I've never been able to find it here in the States, since I don't think it's grown here commercially. My dad brought back some seeds from China to grow at home but his idea of growing vegetables was basically taking the fistful of seeds and throwing it on the ground. Whatdoyaknow nothing grew. Anyways so I make my wontons with salted Chinese mustard greens that I salt at home. I'll post a guide for this eventually (I included the recipe at the end) but you can also use napa cabbage or even bok choy but make sure to salt them first for about 30 minutes and squeeze out all the excess water.


Pork and Vegetable Wontons

1 lb ground pork
1 1/2 C finely chopped napa cabbage, bok choy, packed + 1/2 tsp salt
or 1 C salted (not preserved) mustard greens (instructions below)
1 egg
1 tsp minced ginger
2 Tbsp rice wine
1 Tbsp soy sauce
1/4 tsp sugar
1/4 tsp white pepper
1/4 tsp salt
1 Tbsp corn starch

1 pack of wonton wrappers
Bowl of water for dabbing the wrappers
Flour for dusting surface

For serving:
Chicken stock
Spinach leaves (optional)
Seasame oil

Toss the napa with the salt and set aside for 30 minutes. Squeeze the excess liquid out with your hands or in a cheesecloth and add to a large bowl. Add the rest of the filling ingredients and mix until everything is throughly combined.


Add 1 teaspoon of the filling to the center of the wrapper (pic 1). Keep the rest of the wrappers covered while you wrap each wonton. Apply water to the perimeter of the wrapper on all four sides. Fold the wrapper in half, make sure not to trap any air in the center, press firmly to seal the edges (pic 2). Holding the wonton lengthwise crease the wonton by folding it in half (pic 3). Bring the two corners together (pic 4), dab a little water and press firmly to seal (pic 5). (Doing this with one hand and having to take pics was hard.) They'll look like nurse caps or sometimes like gold ingots like mine (pic 6).

While your folding the last of the wontons, bring a large pot of water to a rolling boil. Add the wontons and turn the heat down so the water is simmering. Give the pot a stir once you add in the wontons so they don't stick to the bottom of the pot or to each other. Cover and simmer for 3 minutes or until they float and the filling is cooked through (you can cut one open to check). If you over cook the wontons, the warpper will be all flabby and mushy, which is not very tasty. Always boil wontons in water and never directly in the chicken stock because the flour on the wrappers will cloud the chicken stock.

Meanwhile, have your chicken stock/chicken soup ready. Bring your chicken stock up to a boil in a separate saucepan. Homemade is best but a good quality canned/boxed kind will do in a pinch. If you want to add spinach leaves, add it at the very end to quickly blanch them in the soup. Serve the wontons in the chicken soup with a drizzle of sesame oil on top.

Freezing Wontons
You can freeze the extras and simmer them whenever you feel like soup. Freeze the wontons in one layer not touching each other on a tray lightly dusted with flour so they don't stick. When the wontons are frozen solid, transfer them to a big freezer bag.

Simmer for 4 minutes (rather than the 3 minutes for fresh ones) in water, or until they float.


I'll post a more in depth guide next time I do this.
Salting Mustard Greens


1 bunch of Chinese mustard greens (xue li hong/sher li hong)
Plenty of salt

Break each leaf off and wash the mustard greens and spin them dry or pat them dry with a paper towel. Place them in a pyrex and sprinkle liberally with salt. Let them stand overnight.

Then keep in the fridge in it's salted juices for up to a week.

Use in stir fries, dumpling, or wonton fillings.

Friday, February 22, 2008

Mapo Tofu

Ma Po Tofu

This picture is making me salivate as I write this at 1 in the morning. I can still remember how the sauce lingered on my lips, making them feel all warm and tingly. Authentic Sichuan cuisine is not for the faint of heart. The food from the province is damn spicy -- face reddening, sweat inducing, fan-yourself-silly spicy. And not only is it spicy, it numbs your mouth too! The famous ma la, or numb and spicy, sensation comes from the copious use of chilies and Sichuan peppercorns. Mapo tofu is one of the best known dishes from the province and has a colorful, slightly controversial, history behind it. The problem with this dish is that its true flavors are drastically muted in many restaurants. Sometimes it looks deceptively red but is not spicy at all! I suspect ketchup... Bah! Ketchup shouldn't be anywhere near this dish. And most of the time, it's missing that critical numbing effect. Up until 2005 the Sichuan peppercorn was banned from the States so not only was it incredibly hard to get the peppercorns *ahem legally* but many chefs chose to leave them out fearing the ma la would be too foreign. Luckily it's getting easier to find restaurants serving authentic Sichuan food but with the right ingredients, this dish is really easy to make at home.

The key ingredients are:
Chili bean paste (Dou Ban Jiang)
- This is the most important ingredient. It's a spicy sauce made from chilies and fermented beans. Broad bean chili paste is best but soybean chili paste is okay too. The brand I use is Lee Kum Kee.
Sichuan peppercorns

Optional ingredients:
Fermented black beans
- You can supplement the dish with some additional fermented black beans but it's okay if you can't find them.
Dried chilies
For even more heat if your chili bean paste isn't spicy enough

Mapo Tofu/ Mapo Doufu
1 block soft but not silken tofu, cut into 1 inch cubes
4 oz ground beef (85% or 90% lean) or pork
3 Tbsp chili bean paste
1 tsp Sichuan peppercorns, toasted and ground or crushed (more or less depending on your tastes)
Dried whole chilis (optional, how much is up to you)
1 Tbsp fermented black beans (optional), rinsed
1 Tbsp soy sauce
1 Tbsp rice wine
3 slices of ginger
4 green onions, sliced in half lengthwise then cut into 3 inch sections separating the white part from the green part (you add them at different times, reserve some of the green parts to garnish on top)
2 cloves garlic, minced or pressed
1/4 tsp white pepper
1/2 tsp brown sugar
1/4 C chicken stock
1 Tbsp oil
1 Tbsp cornstarch mixed with 2 Tbsp water
Salt to taste

If you are using ground beef, brown it first, then drain it of the rendered fat because otherwise the dish will be a little too greasy. Heat 2 tsp of vegetable oil in a wok or skillet over medium high heat. Add the ground beef and cook until the beef is browned and the fat has rendered. Transfer the beef to a sieve to drain the fat and set aside. If you're using ground pork, no need to brown it first.

In the now cleared wok or skillet, heat 1 Tbsp of vegetable oil over medium high heat. Add the ginger slices, white part of the green onion, and ground Sichuan peppercorns and cook until fragrant about 30 seconds to a minute. Add the ground beef that you cooked earlier (or the raw ground pork if you're using that), the chili bean paste, garlic, fermented black beans (if using), soy sauce, rice wine, white pepper, and sugar, and cook for another minute or two. Then add the tofu, green part of the green onions, chicken stock and simmer for about 15 minutes, stir occasionally and carefully so you don't break up the delicate tofu. Meanwhile mix the cornstarch with some water in a small bowl and set aside. After simmering, add the cornstarch slurry and bring up to a simmer again and cook until thickened.

Garnish with chopped green onions and serve with white rice.

Sunday, February 17, 2008

Chinese Fried Noodles

Chinese Stir-Fried Noodles

Noodles in any shape or form are my weakness. They are why I would fail the Atkins diet so miserably. Well that and the fact that I eat rice almost everyday. Chinese stir-fried noodles are one of my favorite dishes because it's delicious and a cinch to make. Like fried rice, it's usually something I can make when I have nothing planned, throw some ingredients together, and it comes out so good every time that I can almost eat the whole pan myself. This is one of the dishes I cooked for Chinese New Year. It's traditional to eat noodle dishes for New Years and birthdays because the long strands symbolize long life. So don't cut your noodles! Slurp, slurp away to your heart's content!

In Chinese restaurants, this dish is usually called chicken, beef, happy family, etc. etc. chow mein, which is the Cantonese translation of pan fried noodles. In Mandarin we call it chao mian, which means the same thing. The dish is made with wheat or egg noodles. I like to use egg noodles because they have a chewier texture and have a pleasant yellow color. If you use rice noodles, it's called chow fun/chao feng. There's a lot of flexibility with this dish. You can use whatever protein and veggies you feel like. Chicken, shrimp, pork, BBQ pork, beef, tofu or a combination would work. You should cut your meat or tofu into strips so they're easier to eat with the noodles but you don't need to cut the shrimp, just peel and devein. I used some Chinese BBQ pork I made the day before. For the vegetables, it's best to use ones that can be julienned or cut into strips. So peas would not be a good idea but you can use carrots, cabbage, snow pea pods, celery, red bell pepper, baby bok choy, sprouts, bamboo shoots, mushrooms, the list can go on and on. I cook things in three stages. First the meat, then the veggies (adding meat to the veggies towards the end), then the noodles and then add everything together in the end to heat through and mix evenly. For a pound of noodles I use a pound of protein and this should serve about 4.

Notes:
- If you're starting with raw meat, use the marinade I included.
- If you're starting with cooked meats, then add the ginger slices to the oil when you're cooking the veggies in step 2
- If you're using mushrooms, you'll need to cook those first before adding the rest of the vegetables, cook them until they release their juices and the juices evaporate before adding the rest of the ingredients. Otherwise the rest of the veggies will get soggy.
- Mix the oyster sauce, soy sauce, and sugar together in a little bowl before you add it to the noodles so you can add the seasoning in one step. Add more seasoning later if you need to.

Chinese Stir-Fried Noodles
1 16oz package of egg noodles fresh or dried
1 lb protein (chicken, beef, pork, BBQ pork, tofu, or shrimp) cut into strips (don't need to cut the shrimp)
I used about 2 cups of Chinese BBQ pork cut into sticks
Your choice of vegetables cut into strips or julienne and you can use however much you feel like
(Carrots, celery, snow peas, celery, baby bok choy, etc.)
I used 2 carrots (julienned) and 8oz. mushrooms (because I was a little short on veggies)
4 green onions, sliced in half lengthwise then cut into 2 inch lengths
3 - 4 Tbsp vegetable oil
3 slices ginger
3 cloves garlic, sliced thinly
2 Tbsp oyster sauce (more if needed)
1 Tbsp soy sauce
1/2 tsp sugar

Marinade for stir-fried meat
2 Tbsp soy sauce
2 Tbsp rice wine
1/2 tsp sugar
1 Tbsp corn starch
1/4 tsp white pepper

If you're starting with raw meat (chicken, pork, beef, shrimp), use mix the strips of meat with the marinade until all the pieces are all coated. Set aside for 10 - 15 minutes.

Bring a pot of water to a boil and cook the noodles according to package intructions. Stop cooking the noodles when there's still a good chew. Drain, rinse in cold water, drain again, and set aside.

Now cook your protein. Heat a tablespoon of oil over high heat in a wok or skillet. First add the ginger slices and let it perfume the oil. Add the meat and stir fry until it's almost cooked through. We'll finish cooking it with the veggies. Remove to a bowl and set aside.

In the cleared pan, heat about 2 teaspoons to 1 tablespoon of oil (depends on how much veggies you have) over medium high heat and stir fry the green onions, garlic, and the vegetables you're using. Season with a little salt, and stir fry until the vegetables are cooked but still crisp/crunchy and definitely not mushy. This shouldn't take too long. At this point, add the meat from step 1 back in to finish cooking with the veggies OR add your chopped precooked meat like Chinese BBQ pork to heat through. Set aside in a bowl.

In the cleared skillet heat 2 tablespoons of oil over medium high heat and add your noodles. Toss them around, get them well coated in the oil, and break up any clumps. If it's too sticky and clumpy, go ahead and add more oil. Pan fry the noodles, stirring and flipping them frequently until some of the noodles get a nice a crunchy golden brown exterior. Then season with the oyster sauce, soy sauce, and sugar. Toss the noodles freuqntly and make sure everything is evenly coated with the sauce. Taste and see if it needs additional seasoning. You may wish to add more oyster sauce, soy sauce, salt, or sugar. When the noodles are seasoned to your liking, add the proteins and vegetables and any liquid that may have accumulated in the bowl back into the skillet, toss until everything is evenly distributed into the noodles.

Wednesday, February 13, 2008

Linzer Cookies

Linzer Cookies

The plan was to continue the Chinese Cooking 100 1/2 series but with Valentine's Day just around the corner (in about 30 minutes as I write this), I couldn't resist posting these heart shaped linzer cookies. The linzer cookie is based on the linzertorte, a tart with a crust made with ground nuts and filled with jam or preserves. The linzer cookie dough is pretty much the same dough used for the tart crust with the difference being that it's cut into fun shapes. The cookies and the cutout center can be cut into any shape you desire and you can fill them with any jam flavor, my favorite being raspberry or strawberry. These heart shapes cookies with a ruby red jewel center are simply perfect for Valentine's day.

Linzer Cookies

Linzer Cookies
Adapted from Dorie Greenspan's Baking
Makes about 20 to 24 sandwich cookies

1 1/2 C ground almonds or hazelnuts
1 1/2 C AP flour
1/2 tsp cinnamon
1/4 tsp salt
1 stick (8 Tbsp) butter
1/2 C sugar
1 egg
1 tsp vanilla extract
1/2 tsp almond extract

Raspberry or strawberry jam
Confectioner's sugar for dusting

If you're starting from raw hazelnuts, toast them in a 350 degree oven for 10 minutes or until golden brown. Then transfer them to a kitchen towel and use to towel to rub off as much of the skin as possible. Transfer the skinned hazelnuts to a bowl and shake out the towel outside so the skins don't fly everywhere.

If you're starting with raw almonds, follow these instructions to blanch them. Squeeze the nuts out of the skin and toast them in a 350 degree oven until they are dry and lightly golden but not browned, about 5 to 10 minutes.

Cool the nuts completely before grinding them. Pulse them in a the food processor until they are finely ground.

Whisk the ground nuts, flour, cinnamon, salt and salt together in a mixing bowl, set aside.

In the bowl of a stand mixer, beat the butter and sugar together until light and fluffy. In a small bowl, beat the egg with the vanilla and almond extract. Add half of this to the butter, beat and scrape down the bowl, beat until combined then add the rest of the egg mixture. Continue to beat until combined. Add the dry ingredients and continue mixing until all the ingredients have been combined.

Divide the dough in half, shape each piece into a disc, and wrap in plastic wrap and chill, 2 hours in the fridge or 45 minutes in the freezer (the dough can be stored for in the fridge for 3 days or 2 months in the freezer).

Preheat the oven to 375 degrees and line two cookie sheets with parchment paper or a silicone baking mat. Keep one disc of dough in the fridge and roll out the other disc. Lightly flour your work surface and roll out the dough until it is about 1/4 in thick. Cut out as many cookies as the dough can fit. Gather up the scraps with the second disc of dough and continue to roll out the dough and cut out the cookies. Cut out the centers of half the cookies.

Transfer the cookies to the baking sheet and bake for 12 - 14 minutes or until the cookies are golden, dry, and firm to the touch. The cookies don't spread so they don't have to be spaced out too far apart. Cool the cookie sheets completely before baking a second batch.

Heat up some jam in the microwave or on the stove top until it is warm. Spread about a half a teaspoon to a teaspoon of jam on the cookie and place a cookie with a cutout center on top. Lightly dust with powdered sugar before serving.


Tuesday, February 12, 2008

The Chinese Pantry Part I: What You Need to Cook Your Food

Before we get into the recipes, let’s do an introduction to the Chinese pantry. What is a well stocked Chinese pantry? At first, all the ingredients sound so foreign and unusual so let's break it up into two parts: "what you need to cook your food" (flavorings, condiments, and sauces) and "what to cook". The challenging part is all the stuff under the what to cook category, since many of those ingredients (tree ear anyone?) are pretty darn weird. We'll start with something a little more manageable, what you need to cook Chinese food.

If I asked you to pick one vinegar or one wine to cook with, what would you pick? For my parents, that would be an easy question. My parents didn't keep cider, red wine, white wine, or balsamic vinegars in their pantry, only Zhejiang black vinegar. Nor did they didn't keep any Merlot, Chardonnay, sherry, or Marsala because all they used was Shao Hsing rice wine. There was no need for a spice rack if you only have star anise. My parents kept a fairly minimal sauce/condiment cupboard but that's because you just need the basic ingredients to make delicious Chinese food. Of course, as you expand your ingredients, you'll expand your culinary repertoire and vary the taste of your dishes.

Some of these items are absolute necessary like soy sauce and rice wine for authentic Chinese cooking. Although many sources say you can substitute sherry for the rice wine, I do not recommend it. Rice wine and soy sauce make up the pillars of my Chinese cooking so I think Shao Hsing rice wine is essential. However, with ingredients that may be harder to find or ones that you may not use as frequently, it's okay to make substitutions like using a different vinegar for black vinegar or granulated sugar for rock sugar, but your dishes won't be truly authentic. Not many spices or aromatics are used in Chinese cooking but the few that are used like ginger, green onion, star anise, and white pepper, are used very often and should be kept in your pantry. Some essential ingredients differ between regions since there's huge regional variation in Chinese cuisine. For example, Sichuan peppercorns are used heavily in Sichuan cuisine but almost never in Cantonese cuisine.

So without much further ado, here's a peek into my pantry.

The Sauce Cupboard
Chinese Pantry

The sauce cupboard, usually the cupboard next to the stove, is the place where you keep the ingredients you use most so it's within arms reach whenever you need it. These are the ingredients that I keep in my sauce cupboard since they are the ingredients that I use most often and do not require refrigeration.

Soy Sauce
Soy sauce is a good example of something I have strong opinions about. Soy sauce should always be naturally brewed and never artificially flavored. The only ingredients should be soy beans, wheat, and salt; preservatives are acceptable but artificial flavor and color (like weird vegetable protein, corn syrup, and caramel) should never be in there. There are two types of soy sauce- light and dark. Light soy sauce is not only lighter in color, but it's also lighter in soy flavor. It's thinner and saltier than its dark counter part. It's used for all purpose cooking, marinating, and dipping. My preferred brand is Pearl River Bridge Superior Light because this is the brand my parents always bought and now this is the only brand I use (oh and lots of Chinese cookbooks recommend this brand too). I have used Kikkoman in the past but found it way too salty and the flavor too one-dimensional. When Cook's Illustrated held their soy sauce taste test, some testers described Pearl River Bridge as beefy, salty, and smoky while others found it lacking depth and complexity. Usually I go with whatever Cook's Illustrated recommends but not for soy sauce. This time, I completely disregarded their recommendations. In fact, I was irritated that my favorite soy sauce didn't place in the top (how can random taste testers know more about soy sauce than my parents right?). Even though the bottle says to refrigerate after opening, I’ve never refrigerated soy sauce.

Dark Soy Sauce
Dark soy is thicker, a little less salty, a little sweeter, and has a more robust soy flavor and aroma. Because of the stronger flavor, I use this very sparingly, rarely for all purpose cooking (occasionally a little bit in a meaty stir fry) and never for dipping. It's primarily used for braises like red cooking or tea eggs. I'm not as adamant about dark soy as I am with light soy but I would still stick with Pearl River Bridge.

Shao Hsing/Xing Rice Wine
This is China's most famous rice wine, named after the city that produces it. There's the good stuff that's made for drinking and the cooking variety that's commonly available at the Asian grocery store. This is one case when you can actually cook with the "cooking" wine (though I bet food will taste even better if you cook with the high quality drinking stuff). It's used for general all purpose cooking like marinating meats before stir frying, braising, and adding to fish before steaming to help get rid of any fishy odor. It is also the main ingredient for drunken dishes, where meats are soaked in a mixture of wine and soy sauce.

Rice Vinegar
This is a relative newcomer to my pantry. I purchased this after I learned how to make liang ban (Chinese salads) from Steven's mom. Clear rice vinegar is used when you don't want the black vinegar to darken your vegetables. It can also be mixed with soy sauce for a dipping sauce for potstickers. Make sure to get pure rice vinegar and not sushi rice vinegar which has added salt and sugar.

Zhejiang/Chinkiang Black Rice Vinegar
The best black vinegar comes from the Zhejiang/Chinkiang area. It is used in hot and sour soup, tang cu (sweet and sour) dishes, and used for dipping Shanghai's famous xiao long bao (little soup buns).

(Toasted) Sesame Oil
Ever since I was little, I’ve loved drizzling this on my food. Just smell this stuff! It smells so good! It's used for finishing dishes, mixing into noodles, drizzling on soups, adding to dumpling/wonton fillings, adding to Chinese salad. Never use this to cook because it scorches too easily and will taste bitter and burnt. Kadoya is the brand I grew up and like my Pearl River soy sauce, I never buy anything else. The color of the oil should be a rich brown, not a pale yellow like the sesame oil pressed from untoasted seeds. Store it away from light and heat. I keep mine in the sauce cupboard and have not had any problems.

Rock Sugar
For the most authentic braises like red cooking, use this type of sugar. For all purpose cooking and marinating meat I use granulated sugar (chicken and seafood) and sometimes brown sugar (beef sometimes pork). It comes in pretty big chunks so you'll need to use a hammer or meat mallet to break it up into smaller usable pieces.

Cornstarch (not pictured)
Another essential ingredient is cornstarch/corn flour. It's used to thicken sauces but don't abuse it like many bad Chinese take out places or you'll end up with booger-like sauces. It is also added to meats before stir frying to protect them from drying out in the wok.

Peanut Oil (not pictured)
For truly authentic Chinese dishes, you need to use peanut oil. This oil is excellent for deep frying and stir frying because it has a high smoke point so it can stand up to the heat of the wok. But peanut oil can be expensive and since I don't deep fry at home, I just use vegetable oil for my stir fries.

The Fridge
Chinese Pantry

Oyster Sauce
Oyster sauce is a relatively newcomer to Chinese cuisine (created in 1888 rather than thousands of years ago). Originating in the province of Guangdong, it's very popular in Cantonese cuisine. It was created by Lee Kam Sheung and his company Lee Kum Kee still makes oyster sauce and a variety of other sauces to this day. Oyster sauce can be used in stir fries to add the xian (umami) flavor to your dishes. It is a popular sauce for cooking jie lan/gai lan (Chinese broccoli). I like to use it for fried rice and fried noodles.

Hoisin Sauce (Hai Xian Jiang)
Hoisin sauce is mainly used as a dipping sauce, not cooking. It is traditionally served with Peking duck. It can also be used in the marinade for cha shao rou (Chinese BBQ pork).

Optional
Chili peanut sauce/oil (jar on the left)
My favorite brand for spicy products is Lao Gan Ma (both the chili peanut oil and soybean oil are this brand). This is good for mixing into your food, whether it's when you're cooking and you don't have chili pepprs or at the table if you want something a little spicy. It's also good mixed into dipping sauces for potstickers. Steven likes to mix this into his fried noodles.

Chili bean paste (picture needs updating)
This is made from fermented broad beans or soy beans, chilies, and oil so it's great for making mapo tofu.

The Aromatics
Chinese Pantry

There aren't very many spices used in Chinese cuisine but there are a few commonly used aromatics and spices.

White pepper
White pepper is used in stir fries, dumpling fillings, sprinkled on soups.

Ginger
Ginger is commonly used in stir fries, braises, dumpling fillings, soups, almost everything. Most of the time, ginger is cut into slices, which can be added to hot oil to flavor the oil before stir fry, or added to soups as it simmer. It can be cut into strips or slices to put in a fish cavity as it steams to help get rid of any fishy odor along with the rice wine. Or it can be minced and added to dumpling fillings.

Green Onion
Green onions are indispensable in Chinese cooking. They are added to stir fries, steamed dishes, braises, soups, savory pastries, again almost everything. When it’s added to hot oil, the heat blooms and mellows the flavor of the green onion and turns it into something amazingly fragrant. This oil can be used for stir fries or as a finishing oil and poured onto dishes like steamed fish.

Star Anise
This spice is primarily used for braises and simmering meats like red cooking or tea eggs.

Sichuan/Szechuan Peppercorns
This is actually a berry, not a true peppercorn. It is used heavily in the region's cuisine to impart a ma la, a numbing spicy sensation to dishes like mapo tofu or kung pao shrimp.

More spices and aromatics (not pictured)
Cilantro also called Chinese Parsley or Coriander
This is a popular garnish on noodle soups. However, Steven can't stand it (he's one of those people with that weird genetic trait thing makes cilantro taste soapy) so I rarely have it in the fridge.

Garlic
Garlic is sometimes added when stir frying vegetables. It can also be used to flavor oil, like ginger, by cooking slices of garlic briefly in hot oil until the pieces are golden. Sometimes the fried garlic pieces are used as a topping on dishes like crab or deep fried foods.

Five spice
Is a spice blend of star anise, cassia (Chinese cinnamon), fennel, clove, sichuan pepper. It is not used very often and not commonly found in the home kitchen. It can be used to flavor roast ducks and Chinese BBQ pork.

Cinnamon/Cassia
The bark of cassia or Chinese cinnamon is sometimes added to braises.

Stay Tuned:
The Chinese Pantry Part 2: What to cook

Sunday, February 3, 2008

Hot Fudge Pudding Cake

Hot Fudge Pudding Cake

Magic. It's really the only word that can describe this dessert. This cake defies the laws of science and common sense. How can two separate layers of batter on the bottom and liquid on top switch places to create a sinfully decadent chocolate cake on top of a pool of a silky smooth fudge sauce on the bottom? The cake batter looks perfectly normal as it's poured into the baking dish, though it starts to look funky after it's covered with cocoa and sugar. But then... there's a definite moment of hesitation as you hold the measuring cup filled with dilute coffee in your hand. Am I really going to do this? Does the recipe really say to pour this stuff on top of the batter? Common sense tells you no. After double checking the recipe, you do as it says and bite your lip as you slide the sludgy mess into the oven. But don't worry, the oven is a magical place wondrous things happen.

Please vote for me! :) Click to head on over to Culinate


They say baking is a science because it requires the precision of a laboratory experiment and the results are predictable, just like the chemical reactions that take place. But, I don't know how to explain this cake. The batter is on the bottom, sugar is in the middle, and liquid is on top. Then 45 minutes later, it jiggles precariously as it comes out of the oven. It doesn't look like much at all but when you finally dig in, you see there's a crunchy, sugary crust on top of a dense, rich chocolatey cake, and on the bottom, oh the bottom, is a luscious fudge sauce. How do these layers switch places? I don't know. Doesn't heavier stuff sink? Shouldn't the batter stay on the bottom? I don't know... All I know is this recipe is one of the most amazing chocolate desserts I've had in a long, long time. Best of all it's ridiculously easy to make and totally accessible for every home cook. It's something you can eat in the nook for breakfast after early morning baking, like I did, serve after an elegant dinner, or reheat in the microwave for a resolution-breaking midnight snack. It uses ingredients that everyone in their pantry and doesn't require any fancy equipment or gadgets. All in all, this is a dessert that captures the essence of Nook & Pantry.

Hot Fudge Pudding Cake

Hot Fudge Pudding Cake
Adapted from Cook's Illustrated

2 tsp instant coffee
1 1/2 C water (or mix 1 cup of cold leftover coffee with 1/2 C water)
2/3 C Dutch-processed cocoa
1/3 C packed brown sugar
3/4 C granulated sugar
6 Tbsp unsalted butter
3 oz bittersweet chocolate, chopped
3/4 C AP flour
1 1/2 tsp baking powder
1 Tbsp vanilla extract
1/3 C whole milk
1/4 tsp salt
1 egg

Preheat the oven to 325 degrees F and adjust the oven rack to the lower middle position. Spray a 8 inch baking dish with nonstick cooking spray. Whisk the instant coffee into the water and set aside. In a bowl, stir together 1/3 C of the cocoa powder, the brown sugar, and 1/3 C of the granulated sugar. Break up any large clumps of the brown sugar and set aside.

Melt the butter in a heat proof bowl over a pot of barely simmering water or in the microwave. Add the chopped chocolate and stir until the mixture is smooth (heat it in the microwave using low power if the chocolate does not all melt). Add the cocoa powder and stir until smooth. Set aside to cool.

In a separate bowl whisk together the flour, baking powder, and salt and set aside.

Add the remaining granulated sugar, vanilla, milk, and egg to the chocolate mixture and mix until smooth. Add the flour mixture and whisk until the batter is smooth.

Pour the batter into the prepared baking dish, spread it out, and smooth the top. Sprinkle the cocoa and sugar mixture that you set aside earlier evenly over the batter. It should cover the batter completely. Then drizzle the coffee mixture all over the top of the cocoa mixture.

Bake for about 45 minutes, or until the cake is puffed, bubbling, and starting to pull away from the sides of the pan. Do not overbake. Cool the cake for 20ish minutes before serving; they will fall as they cool. Serve with vanilla or coffee ice cream or whipped cream and berries.

Warm leftover cake in the microwave and it'll taste just as good the next day.

Hot Fudge Pudding CakeHot Fudge Pudding Cake
(Don't overfill your ramekins like me. Individual cakes should be baked in 8 portions.)

For Individual Cakes
Preheat the oven to 400 degrees F and spray 8 ramekins with nonstick spray and set the ramekins on a baking dish.

Divide the batter evenly in the ramekins and smooth out the top. Sprinkle 2 tablespoons of the cocoa sugar mixture over the top of the batter. Make sure to cover the batter completely. Drizzle slowly pour 3 tablespoons of the coffee mixture over the top of the cocoa. Bake for about 20 minutes, or until puffed and bubbling. Cool for 10 minutes before serving; they will fall as they cool. Serve with vanilla or coffee ice cream or whipped cream and berries.

Warm leftover cake in the microwave and it'll taste just as good the next day.


Hot Fudge Pudding Cake

Saturday, February 2, 2008

Super Bowl Chili

Super Bowl Chili

Not many dishes spark as much controversy as chili. Debates rage on over the merits of storebought chili powder versus home ground ancho chilies, tomatoes or no tomatoes, vegetables or only meat, and the most disputed ingredient of all... beans. True Texan chili con carne contains only meat and dried chilies. Purists will argue that if you add any other ingredients then the dish no longer qualifies as chili but with so many regional variations, personal preferences, and secret ingredients that range from the interesting like beer, chocolate, and coffee to the downright bizarre like peanut butter and banana (this one makes me say what the heck), it's hard to say if there's a real right or wrong way. This Super Bowl chili features all of the aforementioned sacrilegious ingredients: vegetable, tomatoes, and beans, though strangely enough this is the chili that everyone is most familiar with since it's the kind thats widely available canned in the grocery store. This recipe is much better than anything that comes in a can and will make a hearty addition to your Super Bowl spread. If you can, make the chili a day before you wish to serve it because it tastes so much better the second day after the flavors have matured. Have a selection of condiments available because the fun part is deciding what to put on top of your big bowl of chili. You can serve the chili by itself, with cornbread, over rice, or my personal favorite, with Fritos corn chips.

Super Bowl Chili
Adapted from Cook's Illustrated
Serves 8 - 10

2 lbs ground beef, preferably 85% lean
2 medium onions, diced fine
1 large red bell pepper, 1/2 inch cube dice
6 cloves garlic, minced or pressed
1/4 C chili powder
1 1/2 tsp ground cumin (or roughly 1 3/4 tsp whole cumin toasted and ground)
1 tsp dried oregano
1/2 tsp red pepper flakes (to taste)
1/2 tsp cayenne pepper (to taste: I didn't use red pepper flakes so I used a teaspoon of cayenne)
3 chipotle peppers packed in adobo, chopped
2 Tbsp adobo sauce
1 28 oz diced tomatoes, preferably Muir Glen fire roasted
1 28 oz tomato puree or tomato sauce
2 15 oz cans dark red kidney beans, drained and rinsed
Salt and pepper
Vegetable oil

Serve with:
Shredded Cheddar or Monterey Jack Cheese
Sour Cream
Avocado cubes
Chopped fresh tomato
Chopped green onion
Diced red onion
Cilantro leaves
Lime wedges

Heat a Dutch oven over medium high heat. Add a tablespoon of vegetable oil and brown half of the ground beef. Once the first batch of beef is browned, remove the meat keeping the fat in the pan and add the second half and brown the beef. Once all of the beef is browned, drain and reserve. Drain the rendered fat from the Dutch oven reserving two tablespoons of fat in the Dutch oven.

In the Dutch oven over medium heat, add the onions, red peppers, garlic, chili powder, cumin, oregano, red pepper flakes, cayenne, chipotle peppers and cook until the vegetables are soft, about 10 minutes. Add the beef, tomatoes, tomato puree, beans, adobo sauce, and bring it up to a simmer. Simmer with the lid ajar for an hour and a half. Remove the lid and simmer another 30 minutes, stirring occassionally, until the chili is dark and thick. If it starts to stick on the bottom stir in a little bit of water.

Ideally serve the next day with your choice of condiments.

Friday, February 1, 2008

Buffalo Wings

Buffalo Wings

I am not the biggest fan of football but Super Bowl Sunday is almost like a national holiday so I can't let it go unmentioned. Did you know it's the second largest food consumption day of the year? (The first being Thanksgiving of course) So today and tomorrow, I'll be posting some Super Bowl favorites because even though I may not enjoy watching the game, I sure love the food that comes with it. And no sports party is complete without the required buffalo wings.

First created in Anchor Bar in Buffalo, NY, hence the name, authentic wings are deep fried then covered with a sauce made with butter/margarine and hot sauce. It's generally agreed that Frank's Red Hot is the most authentic sauce to use but stay away from the Frank's bottled buffalo sauce since that kind has weird margarine mixed in. The ratio of hot sauce to butter you use depends on how hot you want your wings. I like my wings pretty hot so I like to use a 2:1 ratio of Frank's to butter with a shakes of Tabasco. I chose to lightly flour then pan fry the wings slowly over moderate heat, the same method I used for the salt and pepper chicken wings. Purists will say that without the deep fryer, these can no longer be called buffalo wings but this method yields a nice crispy skin and uses much less fat.

Buffalo Wings

2 lbs. chicken wings, wingtips removed, cut into wingettes and drumettes
1/4 C flour
Frank's Red Hot Original (to taste; I used 4 Tbsp)
Melted butter (to taste; I used 2 Tbsp)

Serve with
Celery sticks and Blue Cheese Dressing

Lightly dredge the wings with some flour.

Heat 2 tablespoons of oil in a nonstick skillet over medium heat. Add the wings and cook them slowly over medium heat until they are cooked through and golden brown on all sides. Turn them frequently in order to brown them on all sides and prop them next to each other so they don't roll around. Cook them until the juices run clear and the internal temperature is 180 degrees F, about 15 to 20 minutes.

Alternatively you can sear the wings over medium high heat and finish them in then oven (350 for roughly 15 minutes).

Meanwhile, melt your butter and mix in the Frank's hot sauce. It's really a matter of taste so play around with how you like your sauce.

After the wings are cooked, put them in a bowl and toss them with the toss. Serve immediately with celery sticks and blue cheese dressing.


For something more substantial try Buffalo Chicken Drumsticks

Come back tomorrow for Super Bowl Chili.

LinkWithin

Blog Widget by LinkWithin