Sunday, September 30, 2007

Cinnamon Buns and Sticky Buns (v 2.0)

Cinnamon Buns

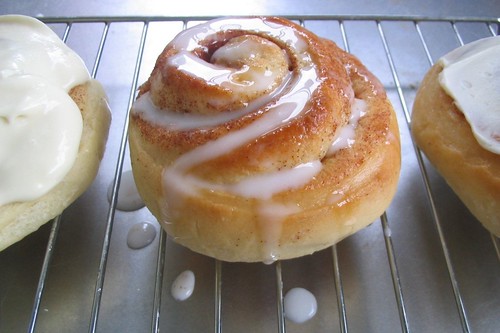
(From left to right: Maple Cream Cheese Frosting, Icing, Cream Cheese Frosting)

Did you know Cinnabon first started as a single bakery in a Seattle area mall? I guess that's another overprice chain (Starbucks I am looking at you!) that Seattle is responsible for spreading to the rest of the world. (Don't worry Seattle, I still love you) It was the perfect excuse to put the trusty stand mixer to work when Marce picked cinnamon buns and sticky buns for this month's DB challenge. Mmm... I can smell them already!

I love working with sweet bread doughs. This is maybe because my very first yeasted baked good (other than the foolproof no-knead bread) was a batch of pecan sticky buns. Those fluffy and gooey sticky buns helped me overcome my fear of yeast. Active dry yeast intimidates me; the proofing, hoping the water isn't too hot, fearing my yeast is dead, wondering if the weird yeast brew ready, was enough to deter me from baking bread for years. But instant yeast changed all that. It's great to work with, no proofing, no guesswork, just toss it in with the dry ingredients and it'll do its thing. I love the soft supple feel of sweet bread doughs, they're more tender than the average flour, water, yeast, salt bread doughs, and their gentle buttery aroma. Sticky buns, brioches, challah, and the likes hold a special place in my heart.

This month, I wasn't the only one excited for the challenge. Steven L-O-V-E-S sticky buns. I found it absolutely endearing to see him so excited, asking me when I'm going to make those sticky buns. Sticky buns are now a morning staple and it's even encouraging us to eat breakfast everyday! Hooray!

I have to say that this challenge was the easiest of the DB challenges I have completed so far.

Now lets get into the recipe.

The allowed modifications to the recipe were:
- You can use any spice mix you'd like, ginger, allspice, cardamom, etc. But I chose to keep it simple with just cinnamon sugar.
- You can do cinnamon buns or sticky buns or both.
- Nuts are optional
- Can substitute another dried fruit for raisins in sticky buns.

Cinnamon Buns & Sticky Buns
Adapted from Peter Reinhart´s The Bread Baker´s Apprentice

Days to Make: 1: 15 minutes mixing; 3 1/2 hours or longer fermentation, shaping and proofing; 20 to 40 (mine were done in 15 - 30) minutes baking
Yield: Makes 8 to 12 large or 12 to 16 smaller cinnamon or sticky buns

Dough
6 1/2 Tbsp (3.25 ounces) granulated sugar
1 tsp salt
5 1/2 Tbsp butter
1 large egg
1 tsp grated lemon zest
3 1/2 C AP flour (I think AP flour makes them more tender than bread flour)
2 tsp instant yeast (I have a big jar of yeast but if you had a 2 1/4 packet of yeast you can use the whole thing)
1 1/8 to 1 1/4 C buttermilk at room temp

Cinnamon Sugar Filling
6 1/2 Tbsp granulated sugar
1 1/2 tsp cinnamon (or your own combo of spices)
1 Tbsp melted butter (my addition)

White Fondant Glaze for Cinnamon Buns
1 C powdered sugar
1 1/2 to 2 Tbsp warm milk

Caramel Glaze for Sticky Buns
1/4 C granulated sugar
1/4 C firmly packed brown sugar
1/4 tsp salt
1 stick unsalted butter at room temp
1/4 C corn syrup
1 tsp vanilla extract
Nuts and fruit of your choice: pecans, walnuts, raisins, etc. (I used 3/4 C pecans)

Note about yeast: Instant yeast is also called perfect rise, rapid rise, fast rising, and bread machine yeast. Different names but they're all instant yeast. It is dried differently from active dry yeast and as a result it requires no proofing, can be added to your dry ingredients, and goes to work faster. I like to keep my yeast in the freezer so it lasts longer. (Here's a link about yeast: Understanding Yeast)

Cream the butter, sugar, and salt with a hand mixer, or paddle attachment of a stand mixer, or by hand. Add the egg and lemon zest and beat until smooth, be sure to scrape down the bowl often. Start by adding 1 1/8 cups of buttermilk, the flour, and yeast. Mix on low speed until the dough comes together then switch to the dough hook if using a stand mixer.

Increase the speed to medium and knead for about 10 minutes (or 12 - 15 by hand). The dough should be silky and supple and somewhat tacky but not sticky. If you're using a stand mixer, as the dough is kneading on the dough hook, it should stick to the divot in the bottom of the bowl. If the dough is sticking to the sides of the mixing bowl, it is too wet and add a bit more flour until it clears the sides of the bowl but still sticks to the bottom. However if the dough is not sticking at all to the bowl, it is too dry, so add a little buttermilk and continue kneading.

Coat a large bowl with oil then roll dough around in the bowl to coat with oil. Cover with plastic wrap and let it rise at room temperature until the dough doubles in size, about 2 hours.

My tip of the day: I have a large 2 quart pyrex measuring cup that I always use for rising dough. The markings on the side are perfect for knowing exactly when dough has doubled. In a large bowl, it's hard to tell just how large the dough should be.

Also, always make sure the dough has doubled, do not stop the rising short because the recipe says about 2 hours. Kitchen temperatures vary and it can depend on the kind of yeast you use and how old it is. Just be patient and let the yeast do its job. My dough took almost 3 hours. However, if after an hour or 2 your does not look like it's rising at all, the yeast may be dead and you'll need to make another dough with newer yeast.

After the dough has doubled, lightly flour your work surface. Roll out the dough to a large rectangle. If you are making large buns, roll it to about 2/3 in thick and 14 in by 12 in (8 to 12 buns). For smaller buns, roll it out to 18 in by 9 inches (12 to 16 buns). Keep the dough thick, if you roll it out too thin, it will be tough and chewy instead of soft and fluffy after baking.

Sprinkle the cinnamon sugar over the surface of the dough and roll the dough up very tightly into a long cylinder. I had a problem of keeping the cinnamon sugar on the dough as I rolled and sliced them. The best trick (I learned from Cook's Illustrated) is to melt a tablespoon of butter and mix it with the sugar, forming a sandy mixture. Then you can press the sandy sugar onto the dough and it will stay put. After rolling, pinch the seam shut. The middle will be a little bigger than the ends, so gently roll it so the log evens out.

Cut the buns into 8 - 12 pieces for large buns or 12 to 16 pieces for smaller buns. Sometimes the 2 end buns are really tiny, so I unroll one and reroll it around the other. This makes a bun that's the same size as the rest but you end up with 1 less bun that you cut. The first time I made this recipe I ended up with 15 buns total, 9 sticky buns (3 by 3 in an 8 in baking pan) and 6 cinnamon buns. If you are making a full recipe sticky buns (9 x 13 pan) cut the log into 15 pieces so you can do 3 by 5 buns in the pan.

Here is where the recipe diverges depending on which buns you want to make.

Cinnamon Buns (Sticky Bun Instruction to Follow)
For the cinnamon buns, line a sheet pan with parchment paper. Place the buns so that they aren't touching but somewhat close to each other, and cover with plastic wrap.

Preheat the oven to 350°F (175°C). Bake cinnamon buns on the middle shelf. Cinnamon buns will bake for about 15 - 20 minutes. (Most DBs found that the buns baked faster than the recipe suggests which was 20 - 30 minutes for cinnamon buns).

Let the buns cool until they are warm but not hot before serving, about 10 minutes for cinnamon buns.

Make the fondant glaze for the cinnamon buns. Whisk the warm milk in with the sugar until a thick paste forms, add more milk if you need to. Drizzle over warm buns to serve.


Sticky Buns

For the sticky buns, make the caramel glaze, beat the 2 sugars and salt with the softened butter in a mixer. Then add the corn syrup and vanilla extract and beat until light and fluffy, about 5 minutes. Spread about 1/4 in of the glaze on the bottom of a baking dish. This will make enough for a 9 x 13 pan. Since I used an 8 x 8 pan, I halved the recipe (2 tbsp sugar, 2 tbsp brown sugar, 1/2 stick butter, 2 tbsp corn syrup, 1/2 tsp vanilla).

After you have prepared your pan with the glaze, sprinkle your dried fruit on the glaze if using, then place the sticky buns (pretty side down, since they will be turned upside down after baking) on the glaze. Cover with plastic wrap. I don't like to add my nuts at this point because they will get steamed and softened baking under the dough. The best way to keep them crisp is to toast them separately and sprinkle them on the buns before serving.

Let the buns rise for a second time, for about 75 to 90 minutes, until they have grown into each other.

Preheat the oven to 350°F (175°C). Bake sticky buns on the lowest shelf. Sticky buns will take about 20 to 30 minutes. (Most DBs found that the buns baked faster than the recipe suggests which was 30 - 40 minutes for sticky buns). Keep an eye on the sticky buns, if the glaze overbakes it will harden into a candy-like substance rather than stay a gooey caramel. By using a glass baking dish, you can easily monitor the color of your glaze. You can also take a knife and gently slide it under a bun and peak at the consistency of the glaze. It will depend on your oven and take a little practice to know when they are done.

Meanwhile, toast your pecans in the hot oven as the buns bake. Let them cool then roughly chop.

Let the buns cool until they are warm but not hot before serving, about 20 minutes for sticky buns. Flip them onto your serving pan, add your chopped toasted pecans, and spoon any run off glaze or any glaze remaining in the pan, on top of your buns.

***

Additional Recipes & Variations
I personally prefer cream cheese frosting on my cinnamon buns so here are some recipes for cream cheese frostings.

Cream Cheese Frosting
1 bar, 8 oz. cream cheese
2 Tbsp melted butter
1 tsp vanilla
1 C powdered sugar

Whisk everything until smooth. This will make enough frosting for 1 full batch of cinnamon buns.

Maple Cream Cheese Frosting
1 bar, 8 oz. cream cheese
3/4 C to 1 C maple syrup

Whisk everything until smooth. This will make enough frosting for 1 full batch of cinnamon buns.

Cinnamon Brown Sugar Variation
Replace the granulated sugar in the cinnamon sugar with packed brown sugar.


Maple Sticky Bun Variation
Replace the corn syrup for maple syrup in the sticky bun caramel glaze


***

Just for fun, I decided to do a comparison between this sticky bun recipe and the recipe from Cook's Illustrated, which you can find here.

The Dough

Bread Baker's Apprentice
3 1/2 C flour
1 1/8 C buttermilk
1 large egg
6 1/2 Tbsp sugar
5 1/2 Tbsp butter
2 tsp instant yeast
1 tsp grated lemon zest
1 tsp salt

vs.
Cook's Illustrated
4 to 4 1/4 C AP flour
3/4 C buttermilk, room temp
3 eggs, room temp
3 Tbsp granulated sugar
6 Tbsp melted butter
2 1/4 tsp of yeast (1 packet)
1 1/4 tsp salt

Comparisons:
The CI version makes more dough, since it uses more flour. It uses more egg and more butter, but less sugar. The yeast is about the same and the lemon zest can be omitted or replaced with some vanilla extract.

In the CI recipe, a loose batter is made with the eggs, buttermilk, and melted flour then the flour is added. In the Bread Baker's Apprentice recipe, the butter is creamed with the sugar in the first step of this recipe. Both are very easy methods to make the dough. I would have to say I preferred this recipe. I'm a big fan of buttermilk so I liked that this recipe used more of it. However since the CI recipe used more egg and butter, those buns are a bit richer and more brioche-like.

Caramel Glaze

Bread Baker's Apprentice
1/4 C sugar
1/4 C brown sugar
1 stick butter
1/4 C corn syrup
1 tsp vanilla
1/2 tsp salt

vs.
Cook's Illustrated
3/4 C brown sugar
1 stick butter
6 Tbsp corn syrup
2 Tbsp heavy cream
1 tsp vanilla
1/4 tsp salt

Comparisons:
No major differences other than the CI recipe used a lot more sugar and a bit more corn syrup. The only major difference is that the CI recipe separated the glaze into 2 parts. About 2/3 was baked with the buns and 1/3 was made separately to spread on top of the buns before serving. Sure it makes the buns gooeyer but again like with many CI recipes, it's an extra step and more work. Also the Bread Baker's Apprentice book called for beating everything together and the CI recipe melted everything together. Not that big of a difference.

Overall:
So which recipe is better? CI touts that their recipes are always the best version since they test dozens and hundreds of different recipes to come up with their own. But in many cases, the recipes end up a little fussy with extra steps that can be avoided. I would have to say that the two recipes are really comparable. The only major difference is in the dough. The CI recipe is richer and more brioche-like but both doughs are beautifully soft and supple and a dream to work with. So it doesn't matter which you choose. Personally I liked this recipe more because the steps were more straightforward and I like using lots of buttermilk in my baked goods.

***

Whew that was a long post! I want to thank Marce for picking such a great recipe. Now go and check out my fellow DB's experiences this month.


Saturday, September 29, 2007

Garlic Bread

Garlic Bread
Scarpetta is the Italian word for wiping up the rest of your pasta sauce with a piece of bread. I'm glad there's a term for it because I love ending my meal with a piece of crusty bread and the bit of lingering sauce on my plate. What makes it even better is if it's a piece of garlic bread slathered with butter and toasted to golden perfection.

Garlic Bread
1 large loaf of Italian (or French) bread
1 stick of butter, at room temperature
Roughly 1/2 head of garlic (more or less depending on how much you like)
1/4 tsp dried Italian herbs
1 Tbsp of chopped Italian parsley (I used chives instead)
Optional: A few tablespoons of grated Parmesan cheese (as much or as little as you'd like)

Optional Step: To cut the harshness of raw garlic, you can dry toast it in a skillet. The garlic will not be as smooth and creamy as roasted garlic but it will be a little mellower. Heat a skillet over medium high heat. Add the garlic cloves with skins on to the skillet and toast, shaking occasionally, until the skins are golden brown. When the cloves are cool enough to handle, peel the garlic and use as you would raw garlic in this recipe.

Preheat the oven to 350 degrees F. Slice the loaf of bread in half horizontally.

Put the garlic cloves through a press or smash and finely mince them. Add the garlic, parsley, crumble in the Italian herbs with the softened room temperature butter and mix until combined. Spread the butter to both sides of the bread. If you don't use all of it, you can always freeze it for another time.

Bake the bread until it is warmed through, about 10 minutes. Sprinkle the Parmesan on top if using, then broil the bread until the garlic butter side is golden brown. Keep an eye on it to make sure it doesn't burn. Time will depend on the strength of your broiler, anywhere from 1 to 3 minutes.

Variation: Roasted Garlic Bread

I like this roasted garlic variation more than the original garlic bread. Roasted garlic is sweeter, mellower, and smoother than raw garlic. You can even use the whole head of garlic rather than just half the head. The softened cloves make a delicious puree that's mixed with the butter. Add the herbs as you would normally and use the roasted garlic butter on your bread and bake in the same way.

How to roast garlic:
Slice off the top of a head of garlic exposing the cloves. Drizzle a bit of olive oil on the cloves, sprinkle with a bit of salt and pepper and wrap the whole head in some aluminum foil. Roast in a 400 degree oven for about half an hour or until the garlic is soft and and brown. Squeeze out the cloves and use in pasta, on pizza, baked in bread, or spread on bread, etc.


More Garlic Bread Links
Elise's soft garlic bread looks delicious as well
Heidi adds lemon zest and chives to her Dad's garlic bread recipe

Thursday, September 20, 2007

Plum Cake

Plum Cake
It's starting to rain here and that means it's not going to stop for the next 6 to 8 months. As we approach fall, I'm saying my goodbyes to my beloved stone fruits. I love plums so I'm always eating them as soon as they ripen. It never occurred to me that I could bake with them until I saw Dorie's Dimply Plum Cake. Like many most all of Dorie's recipes, this is another delicious creation. You can eat the cake for breakfast with coffee, in the afternoon with tea, or as a midnight snack with a cold glass of milk. It can be topped with confectioner's sugar or in this case, whipped cream gently sweetened with a touch of honey.

Dorie's Dimply Plum Cake
Adapted from Dorie Greenspan

1 1/2 C AP flour
2 tsp baking powder
1/4 tsp salt
5 Tbsp butter
1/2 C packed light brown sugar
2 large eggs
5 Tbsp canola oil
1 1/2 tsp pure vanilla extract
1/4 tsp almond extract

Preheat the oven to 350 degrees F.

Cream the butter with the brown sugar then beat in the eggs one at a time until everything is throughly mixed. Beat in the oil, vanilla, and almond extract.

Meanwhile in another mixing bowl, whisk together the flour, baking powder, and salt.

Then add the dry ingredients to the wet ingredients and mix until just incorporated. Pour the batter into an 8 x 8 baking dish. Cut the plums in half and remove the pits. Press the plums into the batter cut side up.

Bake for 40 minutes or until a toothpick or knife inserted into the middle of the cake comes out clean.

Top with confectioner's sugar or whipped cream. Sweeten the cream with a little honey as you whip it.

Looking for more plum recipes:
Helen's Shortbread Plum Cake
Anita's Elephant Heart Plum Cornmeal Cake
Lara's Baked Plum Pudding
Lara's Plum Bars

Miso Fish

Miso Fish

While slogging through the blog clog, I found so many recipes from weeks or months ago that never made it onto the blog. This is either because the photo just was not post-worthy or I had neglected to write down the recipe as I was cooking and forgotten the exact quantities of the ingredients. As for this recipe, I'm going to be honest, none of the shots that I took were flattering. Nevertheless, I love this miso fish recipe. It's simple, it's quick, and most importantly it's delicious. In fact it is one of my oldest recipes, dating back to when I first started to cook.

Notes:
- The ratio is 1 tablespoon of miso and and 1 tablespoon of wine for each 4 oz. fillet. You can use 2 tablespoons of each if your fillets are really large.
- I find that my skillet will fit 3 fillets at once, so this recipe is made for 3 servings.
- No salt is called for in the recipe because of the miso. Feel free to add pepper if you'd like
- I most often use tilapia but you can substitute another white fish
- I usually use Shao Hsing rice wine but mirin will also work. The finished product will be a little sweeter

Miso Fish

3 fillets of white fish (around 4 oz.)
3 Tbsp of miso (white)
3 Tbsp of rice wine
1/4 C flour
Vegetable oil

Mix the rice wine and miso together to form a paste. Add the fillets into a zipper lock bag and add the miso mixture on top of the fillets. Close the bag and try to rub the miso mix on both side of each fillet. Marinate in the fridge for 4 hours to overnight. I usually do this in the morning before I leave for work and then I am able to fix it up for dinner.

Heat 2 tablespoons of vegetable oil in a nonstick skillet over medium high heat. Lightly dredge each fillet in some flour. Panfry the fish until both sides have an evenly browned crust, about 3 minutes per side. If your fillets are on the thick side, cook the fillets over medium heat so they can cook through without the crusts burning.

Serve with steamed white rice.

Sunday, September 16, 2007

Maple Dijon Glazed Bacon

Maple Dijon Glazed Bacon

Every Wednesday I read the food section of the Seattle Times. I clip out and save the recipes that interest me in a big binder. It's sad to say that most of these snippets from the paper will be forgotten about in a few days. But the instant I saw the words "maple Dijon glazed bacon" I thought, "Wow! I have to make this ASAP!". Maple syrup, Dijon mustard, and bacon, it just totally clicked! Though it's hard to improve upon something like bacon so I don't blame Steven for being skeptical. He just wanted "normal" bacon. I set aside a few slices of untouched, unglazed, unadulterated bacon just for him. As I happily savored my experimental bacon, I offered a piece to Steven. I watched as he contemplated this new flavor combination. Some silence passed and he said, "Your bacon is better." Yup, I knew this recipe was a winner!

You can cook bacon in the microwave, skillet, and the oven. Cook's Illustrated tested all three ways and found that the oven delivers the best results. The benefit of using the microwave is that it's the easiest and quickest method of the three. However, the bacon goes from flabby to burnt in just a few seconds. It cooks unevenly and the microwave does something funky to the color of the bacon yielding not so appetizing results. On the stove top, the bacon spatters and the uneven heat causes it to curl and cook unevenly, requiring constant babysitting. But in the oven, the heat renders and cooks the bacon evenly with minimal curling. However, the oven takes the longest so if you're in a hurry, you can cook the bacon first on the stove top then glaze it and finish it in the oven for a few minutes.

Note:
- The recipe is easily scaled up or down, just keep the maple syrup to Dijon ratio 3:1.
- This bacon is delicious for breakfast or brunch but I bet it'd make a fantastic BLT too.

Maple Syrup and Dijon Mustard Glazed Bacon
Adapted from the Seattle Times

6 slices of bacon
2 Tbsp maple syrup, preferably Grade A dark or Grade B (Light and Medium are too flavorless in my opinion)
2 tsp of Dijon mustard

Preheat the oven to 400 degrees F. Lay the bacon on a baking rack on top of a tray. Bake in the oven for 5 - 6 minutes. Then rotate the pan 180 degrees and continue to roast for another 3 - 4 minutes for thin slices, 6 - 8 minutes for thicker slices. You'll want to keep an eye on it when it starts to crisp and brown.

Depending on how crisp you like your bacon, you'll want to take it 2 minutes before your preferred crispness to glaze it then return it to the oven.

In a small bowl, mix together the maple syrup and Dijon. Use a brush or spoon to generously glaze the bacon.

Return the bacon to the oven and bacon another 1 - 2 minutes, to desired crispness.


Stove top Method:
You can also cook the bacon on the stove top, which is what I did for the bacon you see in the photo (that's why there's that little curly thingie on the bacon) since we were really craving the bacon.

Cook the bacon in a skillet over medium heat. Low heat will evenly render the fat but will take too long, whereas high heat will unevenly cook the bacon and burn it in spots. Medium heat is a happy middle ground. If you use a cast iron skillet, you can season the pan while you cook your bacon.

While you're cooking the bacon, preheat the oven. You can use a toaster oven if you're making just a few strips. Stop cooking it a minute or two before it's cooked to your preferred crispness.

In a small bowl mix together the maple syrup and Dijon. Use a brush or spoon to glaze the bacon. Then bake in the oven until it is cooked to your preference.

Buttermilk Pancakes

Buttermilk Pancakes

During the week I don't eat breakfast. I know I know, breakfast is the most important meal of the day! I actually really love breakfast and breakfast foods but when I'm unpleasantly jolted awake by the alarm at a time when I simply can't function, I'm just not hungry. If I force myself to eat something, I end up feeling queasy so it's better for me if I go without it. What I love most about weekends is being able to enjoy my mornings; I can sleep in, wake up naturally, and have a leisurely start to my day. Best of all, I can make a proper breakfast, like a tall stack of pancakes with a generous pat of butter on top (which slid off the stack and melted before I could get a photo), and plenty of real maple syrup. Oh and let's not forget the bacon.

Notes:
- This recipe will serve 2 - 3 but can easily be doubled to feed a bigger crowd.
- If you do not have buttermilk, you can substitute clabbered milk. Mix one cup of milk with one tablespoon of lemon juice and let stand for 5 minutes at room temperature. The resulting batter will be a little thinner.

Buttermilk Pancakes
Adapted from Cook's Illustrated

1 C AP flour
2 tsp sugar
1/4 tsp salt
1/2 tsp baking powder
1/4 tsp baking soda
3/4 C buttermilk
1/4 C milk, + more if batter is too thick
1 egg
1 1/2 tbsp melted butter and cooled

Add the dry ingredient to a mixing bowl and whisk to combine. In another mixing bowl, whisk the egg and butter, then add the buttermilk and milk.

Add the wet ingredients to the dry ingredients and mix until just combined, do not overmix.

Meanwhile, heat a griddle or large skillet over medium heat. Take a stick of butter and lightly butter the cooking surface. Pour about 1/4 to 1/3 cup of batter for each pancake. Cook until the surface of the batter starts to bubble and the bottoms are brown, about 2 - 3 minutes. Flip and cook on the second side for another 1 to 2 minutes. Reapply the butter between every other batch.


Variation: Blueberry Buttermilk Pancakes

Additional ingredients: 1/2 C fresh blueberries (if using frozen, make sure to rinse and dry them)

Follow the recipe above. After pouring the batter onto the griddle or skillet, scatter about a tablespoon blueberries on the surface of each pancake. This prevents the berries from getting smashed during the mixing process. Continue cooking per recipe instructions.

This will also work with other berries.

Friday, September 14, 2007

Lemon Cream Tart

Lemon Tart
My fellow Daring Baker, Mary, said "If the Daring Bakers were a Girl Scout/Boy Scout troop, then our manual with badges would be Dorie Greenspan's "Baking from My Home to Yours". Mary, I agree with you completely! Before I started food blogging, I am so embarrassed to admit that I was oblivious to this life changing book and didn't even know who Dorie Greenspan was. *blush blush* But after reading post after post from other DBs, I quickly did my research and set myself straight. As a baking newbie, there are only 2 baking cookbooks on my bookshelf and Dorie's book recently joined them. This book was everything I thought it would be and more - it's simply amazing! In the last few weeks I've owned this book, I've made more recipes from it than my 2 other books combined.

Dorie writes that she learned this lemon cream recipe from none other than the king of pastry, Pierre Herme. I know I'm bad to fiddle with a recipe like this one. Why mess with a good thing you know? But hear me out! Since my tart pan is 8 inches, I had to scale down the recipe which was originally for a 9 in tart pan. So 4 eggs became 3, and the 3/4 cup of lemon juice became a 1/2 cup. After appropriately scaling down the sugar, I also decreased it a bit because I tend to use less sugar in my recipes and prefer my curds more tangy and tart, so 1 cup of sugar scaled down to 3/4 cup but I only used a 1/2 cup. Finally, (here comes the biggest departure) the original recipe called for roughly 2 and a half sticks of butter which scaled down to 2 sticks. As much as I love butter, I just couldn't bring myself to add the full 2 sticks. Butter is the key ingredient that transforms an ordinary lemon curd to "the most extraordinary French lemon cream" because instead of melting like in ordinary curds, it emulsifies into something light and dreamy. But I just couldn't do it! In the end, I only added 1 stick of butter. I can't call this an extraordinary lemon cream, only an ordinary lemon cream, but boy was it the best lemon curd/cream I have ever tasted! I can only imagine how astronomical it would been if I had added the rest of the butter.

Notes:
- The recipe can generously fill an 8 in tart but can also be stretched to fill a 9 in tart.
- To stay true to the original recipe, use 2 sticks of butter.


Lemon Cream
Adapted from Dorie Greenspan

1/2 C sugar
Zest of 3 lemons
3 eggs
1/2 C lemon juice (roughly 3 lemons)
1 stick of butter, cut into one tablespoon pieces
1 premade tart shell

You'll need an instant-read thermometer, a fine mesh sieve, blender or food processor. I didn't have a thermometer so I guesstimated.

Bring some water to a simmer in a saucepan. Meanwhile, in a heatproof bowl big enough that you can set over the saucepan, rub the zest with the sugar, off heat. Then whisk in the eggs and then the lemon juice.

Turn the heat down so that the water is barely simmering, and set the bowl over the saucepan. Whisk and cook the cream until it reaches 180 degrees F.

As soon as it reaches 180 degrees F, strain the curd into your blender or food processor. You can discard the zest that's left behind in the sieve. Let the curd cool until it is 140 degrees F, stirring occasionally. This will take about 10 minutes.

Put the cap on the blender and turn the blender on high. Add the butter 4 tablespoons at a time. Keep blending for another 3 minutes. If the machine gets too hot, you can do it at 1 minute intervals, resting the machine in between.

I was expecting the curd to whip up in the blender, but instead the thick curd was as thin as soup after blending! *panic panic!!*

Pour the cream into a bowl or container and press a piece of plastic wrap against the surface. Refrigerate at least 4 hours or overnight (I would recommend the latter). After a night in the fridge, the completely soupy cream magically thickened into the best lemon curd/cream I have ever tasted! I didn't need to panic, I should have known that a Dorie recipe wouldn't fail me.

Assemble the tart just before serving. Spoon the cold cream into the tart shell and serve immediately.


P.S. Who says you need a tart shell. It's delicious on toast in the morning or *ahem* with a spoon. ;D

Tuesday, September 11, 2007

Fish Cake or Faux Crab Cake

Fish Cake or Faux Crab Cake

Where have I been? Eating my way around Vancouver, B.C. the past few days. I love that city so much; the weather was beautiful, the people were nice, and oh the food. It almost feels like home away from home but Seattle will always hold a special place in my heart. I'm still a little tired so just a short recipe today of something I made before I left for my trip. Actually there are so many photos and recipes in my "to post" folder, I call it my "blog clog." One of these days I'm going to have to sit down and publish everything *gulp*.

Anyway onto these yummy fish cakes. Steven said, "Hmm... these cakes remind me of something." Couldn't quite put his finger on it but eventually we figured out that the texture of pollock was reminiscent of crab leg meat. These fish cakes are essentially faux crab cakes! (Faux crab cake sounds a lot better than imitation crab cake, which sounds distressingly fake and rubbery with a hint of artificial pink.) You can substitute another white fish for pollock, like cod or tilapia, but the texture won't be the same.

First the fish is cooked through by steaming with salt, pepper, lemon juice and white wine. You can also poach or roast the fish but I chose to steam it because I felt like it would prevent the fish from drying out without leeching out flavor. When making Chinese steamed whole fish, I add a little rice wine to cut the fishiness, so this is why I added a little white wine to the fish in this recipe. I love the airy crunchiness of panko bread crumbs so much that they have replaced regular dried bread crumbs in every application. So in goes some panko. Only the green parts of the scallions are used because the green top is milder and can be used more like an herb, whereas the white bottom is more like an onion, and the stronger flavor would be too overwhelming. After adding the rest of the ingredients, the cakes are chilled to prevent them from falling apart while cooking. Finally, they are dredged in flour and pan fried to a beautifully browned and crisp crust.

Fish Cake or Faux Crab Cake
1 lb pollock (or another white fish)
Salt and pepper
2 tbsp lemon juice (juice from half a lemon)
2 tbsp white wine
1/4 C chopped scallions (green part only)
1 tbsp chopped fresh parsley
1 egg, beaten
1/4 C mayo
1/4 C panko, or more if needed
1/2 tsp Old Bay seasoning (optional)
1/4 C flour
3 Tbsp vegetable oil

Tartar sauce for serving (optional)

Salt and pepper the fish, drizzle with lemon juice and steam until the fish is throughly cooked and flakes easily, about 5 - 10 minutes.

Drain the liquid. Break up the fish, leaving some large clumps and wait for the fish to cool to room temperature. Meanwhile in a small bowl mix the egg and mayo.

Once the fish has cooled, add the chopped scallion and parsley, panko, Old Bay (if using) and the mayo-egg mixture, and gently fold everything together. If the mixture looks too wet, add a little more panko.

Divide the mix into 4 portions and form into thick cakes. Cover and chill for 30 minutes or overnight.

After the chill, add the flour to a plate and dredge both sides of the cakes with flour. Heat oil in a nonstick skillet over medium high heat. Cook the cakes until the outsides are crisp and browned, about 4 - 5 minutes per side.

Serve with tartar sauce if you'd like.


Variation:
Replace the fish for lump crab meat and voila! you have a (real) crab cake.

Thursday, September 6, 2007

Tiramisu Ice Cream

Tiramisu Ice Cream

Tiramisu is a dessert I never tire of in any form (tiramisu brownie anyone?). I experimented with a tiramisu ice cream during the summer and it was really tasty. But just because the weather is starting to cool down doesn't mean I have to stop making ice cream. I'm with Brilynn on this one; I'll be making ice cream through the winter, clutching the spoon with my fingers poking out of convertible mitten gloves, and trying not to dribble any on my Slanket. Plus, I still need to try David's tiramisu ice cream recipe because my goodness the mocha ripple swirl-in sounds fantastic.

I prefer marsala in my tiramisu but you can also substitute rum or kahlua, since those liquors are stronger, you can use half as much... if you want *wink* (ice cream can be a pick-me-up too). I think that doubling the mascarpone and using the whole 8 oz. tub would make it even tastier. The alcohol and extra fat will keep the ice cream soft and creamy in the freezer.

Tiramisu Ice Cream
1 C milk
2 egg yolks
1/4 C sugar
1 Tbsp instant espresso powder
1/2 C heavy or whipping cream
1/4 C marsala
4 oz. mascarpone

Stracciatella, mix in
About 1 to 2 oz. dark chocolate, melted

Heat the milk in a saucepan to almost a boil. Meanwhile in a mixing bowl, whisk the egg yolks with the sugar until thick, pale yellow, and ribbony.

Anchor the bowl by wrapping a damp towel around the base. With one hand ladle scoops of the hot milk mixture into the egg yolks while constantly whisking. Continue to temper the egg yolks with all of the milk. Return the mixture to the saucepan and cook over medium heat. Continually stir and scrape the bottom with a spatula and cook until the mixture thickens and coats the back of the spatula. Draw a line with your finger down the spatula, if the edges stay clean and do not run then the mixture has throughly thickened.

Off heat, whisk in the espresso powder and cream. In another bowl, mix the mascarpone and marsala until combined and smooth. Whisk in the custard mixture. Chill throrougly in the fridge. Then freeze in your ice cream maker according to machine instructions.

In the last few minutes of churning, melt your chocolate. Then in the last minute of churning, pour a thin stream of the chocolate into the ice cream. As it churns, the chocolate will harden instantly and become shardlike pieces in the ice cream. If your machine does not have a hole to pour in the chocolate, fold in the chocolate with a spatula after churning.

Sunday, September 2, 2007

Hidden Blackberry Cheesecake

Hidden Berry Cheesecake

Here in Seattle blackberries are everywhere, ranging from massive brambles that have invaded vacant land to itty bitty plants poking out of the ground trying to colonize new terrain. To my surprise, there were blackberry growing in the backyard. This was the first summer I had even been aware of their presence because last winter, the (small) yard, which was more like an uncharted jungle, was tamed landscaped into something more manageable. That is, you can venture outside without a loved one having to call a search party. The work also uncovered the blackberry bush and for the last few weeks I've been picking quarts of the berries as they ripen and I can hardly keep up!

Blackberry picking is a tricky business. The best looking berries are always the unattainable ones just out of my reach. I stare at them longingly, yearning to reach the plump, juicy berries glistening in the sun barely inches from my fingertips. I balance precariously on one foot, standing on my tippy toes, while stretching my arm and hand as far as they'll physically go to pluck that perfect berry. One wrong movement will result in an "Ouch!" as a nasty thorn pokes or scratches my skin. A tug too strong and that berry will fall off into the deep thicket lost forever. Even worse, just when I think the berry has landed safely in my palm, it rolls and slips between my fingers. Curses! Foiled again!! After an hour of the hot August sun hitting the back of my neck and my fingers sticky and purple, I say to myself "Okay last berry" but then "Ah Hah!" another perfect berry catches my eyes. Sometimes I am able to pick all the ripe berries before calling it a day but other times there is a limit to how many close encounters with the creepy crawly spiders, who love to take up residence amongst the berries, I can take. They send me running back inside patting myself down and repeatedly brushing off every inch of my skin. *shudder* "That's it for today I'll go back tomorrow," as I admit defeat. Now that it's September and autumn is slowly approaching, the blackberry bush has given the last of it's berries. Most have gone into quiet storage in the freezer and will serve as a reminder of the glories of summer during the gloomy Seattle winter.

A note about blackberry picking: Blackberries tend to grow everywhere and sometimes as your walking, you can't help but notice the easily accessible berries right by the sidewalk. As tempting as these berries may be (I pass berries like these everyday), do not pick them because the plants growing near the streets will often take in the fumes and pollution from the cars and that's not something you want in your berries. It's best to find an area away from roads and traffic for picking. Most parks in the Seattle area have plenty of blackberries so those are a great place to go.

From one of my recent pickings, I came inside with about 3 cups of berries and I really wanted to make some jam. But I'm didn't have pectin, and I'm too paranoid to can so I ambitiously decided to make some pectinless freezer jam. Steven warned me that when his mom and other friends tried to make blackberry jam, it ended up very watery was more like blackberry syrup but I was not to be dissuaded. After simmerring for a long time, I ended up with about a half a cup of thick jam and with only a few spoonfuls of sugar rather than cups, the jam was not cloyingly sweet and was immensely flavorful (very, very blackberry-y). So pectinless jam was possible and it was delicious!

Blackberry Jam
3 C blackberries, washed
3 Tbsp sugar (ratio of 1 tablespoon sugar to 1 cup berries)
1 tsp of lemon juice

To get rid of the seeds, puree the mixture and push it through a sieve or pass it through a food mill. I had some trouble pushing the puree through my fine mesh sieve so a food mill might work better.

Simmer in a saucepan until very thick and a spatula dragged across the bottom of the saucepan leaves a clear trail that does not fill in.

To avoid the canning trouble, just store the jam in your freezer and enjoy it quickly. But you won't need me to say that twice because it's so delicious on a buttered piece of toast in the morning or in a "Hidden Berry Cheesecake" inspired by Dorie.


Hidden Berry Cheesecake

While flipping through the baking book of the year (ahem everyone knows which one I'm talking about), the Hidden Berry Cream Cheese Torte really caught my eye. I loved Dorie's ingenuity in tucking a layer of berry jam underneath the cream cheese filling. Jams are usually good at hiding cracks and imperfections on cheesecakes but bringing it inside brings cheesecake to a whole new level of elegance. Not to mention in the gorgeous photo in the book, the top of the cream cheese torte was absolutely pristine with not a crack or flaw in sight. Since I didn't have cottage cheese on hand, rather than using Dorie's recipe for the cream cheese torte, I went with my standby cheesecake recipe of cream cheese and sour cream in a graham cracker crust. But don't get me wrong, Dorie's recipe looks excellent and I will definitely try it one day. This recipe uses only 2 bars (rather than 4) of cream cheese and as a result makes a thinner cheesecake.

Hidden Blackberry Cheesecake
Inspired by Dorie Greenspan's Hidden Berry Cream Cheese Torte

1 pack of graham crackers (5 oz, 9 whole crackers)
1 Tbsp sugar
5 Tbsp butter melted
2 8 oz. bars of cream cheese
2 eggs
1/3 C sour cream
1/2 C sugar
Pinch of cinnamon
Pinch of nutmeg
1/2 tsp vanilla
1/3 C any berry or cherry jam

Preheat the oven to 350F.

Process the crumbs in a food processor until ground or crush them in a zipper lock bag by rolling over the crackers with a rolling pin. Add the melted butter and sugar and pulse until evenly mixed.

Press the crumbs firmly into bottom and up the sides (about 1 in) of a 9 inch springform. I like to use the flat bottom of a measuring cup or you can use the bottom of a drinking glass to push the crumbs in tight. Bake at 350F for 10 minutes.

Meanwhile, in the food processor add the rest of the ingredients except for the jam, and process until smooth. Alternatively you can cream the cream cheese in the bowl of a stand mixer, add the eggs and incorporate one by one, then add the rest of the ingredients and mix until the filling is smooth.

When the crust is done, spread the jam evenly on the bottom of the crust. Then pour in the cheesecake filling. Bake at 350F for about 50 to 60 minutes, or until the center is no longer jiggly.

Run a knife (to avoid damaging the nonstick on baking pans, I either use a plastic knife or a wooden skewer) along the outside of the cheesecake and remove the pan. Let it cool to room temperature then chill before serving.


Since it's blackberry season, though nearing the end of it, here in the Pacific Northwest and with the blackberries straight from the backyard, I'm going to bring this cheesecake to the biggest patio party of the year, La Festa al Fresco, thrown by the lovely hostesses Ivonne and Lis. There's no such thing as having too many desserts right girls?


LinkWithin

Blog Widget by LinkWithin