Thursday, April 17, 2008

Kona Kampachi

Kona Kampachi Sashimi and Nigiri

When Hannah first contacted me on behalf of Kona Blue asking if I was interested in trying Kona Blue's Kampachi, it seemed too good to be true. I'm not used to getting asked to do reviews so I didn't know what to do. Then I saw a steamy review so I asked Jaden what she thought. Basically it's great fish, a great company, and no strings attached. I love sushi so much, how can I turn down sushi grade fish?! Hannah was also suuuuper nice and answered all of my questions! Thanks Hannah!

Kona Blue was founded in 2001 by two marine biologists who wanted to create sustainably raised, sushi-grade fish. I used to think that farmed fish, like farmed salmon, are inferior in both taste and nutrition to their wild counterpart. However, Kona Blue Kampachi is premium quality fish that's high in healthy omega-3 fatty acids and has no detectable levels of PCBs or mercury (a concern with fish like tuna). Kampachi is native to the waters of Hawaii and is better known as amberjack or kalaha. It's a relative of the Japanese hamachi or yellowtail (not yellowfin, which is a tuna). In the wild, kalaha is particularly susceptible to a toxin that causes serious food poisoning, but through aquaculture and by controlling what the fish eat, kampachi can now be raised sustainably and safely for consumption. The fish are raised in high tech pens suspended in the ocean, fed food made from fish meal and oil from sustainable fisheries and organic wheat, and they are not given any antibiotics or medications. And to top it off, Kona Kampachi has an even higher fat content than wild kalaha, a whopping 30% fat.

When you buy directly from Kona Blue, the fish is shipped overnight to you. I was so excited on the day my fish was to arrive, I kept looking outside the window scanning the streets for the Fedex truck. Inside the package, were 2 very large fillets sitting happily on plenty of ice packs. I've never had so much sushi grade fish in my house, it made me absolutely giddy. The first thing I did was I checked the fish for freshness and gave the fillets a big whiff. There was no fishy smell whatsoever, a good sign. It was pretty much odorless with a slight hint of ocean. I bet you're rolling your eyes thinking "Pssshh smells like ocean, what BS." But it's true, the fish was incredibly fresh! The flesh was firm and shiny, another good sign. I rinsed off each fillet and then removed the bloodline, the dark purply, red flesh on the skin side of the fillets. The bloodline usually tastes too strong, fishy, and just plain funky. It's best to keep fish as whole as possible until you're about to cook or serve it, and break it down into pieces no more than a day in advanced (I broke this rule and had some pieces I cut up 2 days in advance but it was still really fresh 2 days later).

The first thing I wanted to do with the fish was a dinner of sashimi and nigiri. It was so glorious, I couldn't bear to cook it. I reserved 2 large portions for searing the next day. The smaller pieces I used for ceviche and poke, a tribute to this Hawaiian fish. Finally there were 2 pieces of really fatty belly that were too thin for sashimi so I opted to sear these simply with salt and eat with rice for a simple lunch.

The fish is absolutely delicious - quite possibly some of the best fish I have ever had in my life. If purchasing directly from Kona Blue, a whole fish is $8.75/lb and fillets are $17/lb. That's the wholesale price and it's the price that chefs pay. It's still pretty darn pricey! But that's roughly the price I expect to pay for sushi grade fish at upscale markets like Whole Foods. But the deal breaker for me is the shipping, it costs almost as much as the fish itself! Shipping an overnight package from Hawaii ain't cheap, that's for sure. On the other hand, the overnight shipping and plenty of ice does ensure that your fish arrives as fresh as possible. But to be honest I wouldn't purchase this fish online because of the shipping costs. However, all hope is not lost! If you're in Seattle, currently Uwajimaya Market in the International District is the only market in the area that carries this fish ($10/lb for whole fish $20/lb for fillets). Kona Kampachi is already making appearances on menus all across the country. As Kona Kampachi becomes more recognized and more popular, I expect it will be available at upscale markets like Whole Foods perhaps at slightly more affordable prices. Here's the list of restaurants across the country that serve currently serve Kona Kampachi on their menu. So keep an eye out for this fish in the future. If I see this at Uwajimaya or Whole Foods one day, I would definitely buy it as a rare treat. :)

Now here's my Martha moment: Sustainably raised sushi grade fish? It's a good thing.


First a dinner of sashimi and nigiri:

Sashimi
Fish
Shredded daikon (palette cleanser)
Perilla/Shiso leaf (garnish, optional)

Make a mountain of shredded daikon, put some shiso leaves on top, and lay slices of fish on the daikon.

Nigiri
Fish
Sushi rice
Soy sauce
Optional:
Wasabi
Pickled ginger (stay away from the kind that's dyed pink)

The piece of sashimi or fish that goes on top of rice for nigiri should be about 2 fingers wide and 4 fingers across (something I read in the The Zen of Fish but it will vary with the size of your fingers). As for the thickness, that's up to you, but I like a decently thick piece of fish.

There was a whole page in The Zen of Fish dedicated to how a sushi master forms the nigiri rice. The mark of a sushi master is how light and loose the mound of rice is and how most of the rice grains face the same direction. I am no sushi master and the rice grains in my rice mounds definitely don't all face the same direction. But the most important part is to keep your hands slightly wet when forming so the rice doesn't stick all over your hands. Wet your hands, let the excess drip off, and then clap them together to get rid of excess water. Use a gently touch to form the rice mound, don't pack the rice so tight it's like a solid pellet.

As for dipping in soy sauce, never dip the rice part because a well made nigiri will just fall apart. Also never make a paste of wasabi with soy sauce. Most of the wasabi we get isn't even real wasabi, which is notoriously difficult to cultivate, it's horseradish paste with green coloring. The heat of the wasabi dissipates when it hits liquid so don't make that brown sludge with the soy sauce. It's best to dab the wasabi directly on the fish and dip the fish side down in the soy sauce. It's okay to eat sushi with your hands. :)


I never thought I would be sick of raw fish, but after gorging ourselves the previous night, Steven and I yearned for a cooked recipe. The high fat content in the fish not only gives the fish a great mouthfeel when eaten raw but it keeps the fish super moist and delicious even in the high heat of searing. I served the seared kampachi on a bed of cucumber and daikon ribbons and ponzu sauce with rice and cucumber salad.

Seared Kona Kampachi with Ponzu Sauce
Seared Kampachi Fillet with Ponzu Sauce

Kona Kampachi or another high content fish fillet will also work
Salt and pepper
Vegetable oil for searing

Ponzu Sauce
2 Tbsp soy sauce
2 Tbsp yuzu juice or 2 Tbsp lemon juice + 1 Tbsp yuzu marmalade

Season the fish with salt and pepper. Heat 2 teaspoons of oil over medium high heat in a nonstick skillet. ADd the fish and sear until there is a nice golden brown crust on both sides of the fish, 3 - 5 minutes per side.

Drizzle with ponzu sauce and garnish with toasted sesame seeds (optional).

Cucumber ribbons: you can use a mandoline but if you don't have one (like me), hold the cucumber flat on a cutting board and use a vegetable peeler and run it across the length of the cucumber to get a thin strip of even thickness. This works best with baby cucumbers or english cucumbers. Discard the first strip since that one is just skin.


Kona Kampachi Ceviche

Then the next day I tried two more recipes, one raw and one "cooked". I made a poke, a Hawaiian fish salad appetizer made with raw fish and a variety of other condiments, and ceviche, another type of fish "salad" where the fish is "cooked" in citrus juice. The acid in the juice denatures the proteins in the fish and slowly turns the fish from translucent to opaque, essentially cooking the fish.

I couldn't believe how easy it was to make ceviche. The mango added a really nice tropical sweetness and the toasted corn added a really light smokey flavor.

Ceviche
Kona Kampachi Ceviche2 C sushi grade fish like kampachi, snapper, or scallop cut in a 1/2 inch dice
1/4 C lemon juice
1/4 C lime juice
2 - 3 roma tomatoes, 1/2 inch dice
1 C corn
Half a medium onion, small dice
1 mango, small cubes
1 avocado, small cubes
2 Tbsp or more to taste minced parsley, cilantro, or combination
2 Tbsp extra virgin olive oil
Salt and pepper to taste

Add the citrus juices to the fish in a nonreactive bowl. Cover and refridgerate for 3 - 6 hours, stir every hour. The longer the fish marinate in the juices, the more cooked it will be.

Cut the tomatoes into a dice similar to the size of the fish and let it drain in a colander for 30 minutes.

Heat an empty skillet (no oil) over high heat and add the corn. Cook, shaking the pan occasionally, until the corn has toasty brown spots, and is almost popping out of the pan. Set aside to cool.

After the fish has cooked to your liking, drain it from the juices. Add the chopped onions, tomatoes, avocado, mangoes, corn, parsley/cilantro, olive oil, and season with salt and pepper. Let it sit in the fridge for at least an hour for the flavors to meld.

Serve with tortilla chips or on warm corn tortillas.


As for the poke, it was mix this and that in and season to taste with soy sauce and sesame oil. I didn't have any fresh seaweed, which is what's traditionally used, so I used some thinly sliced nori.

Poke
1 C cubed sushi grade fish usually mahi mahi, but I used Kampachi
1 - 2 Tbsp light soy sauce
1 - 2 tsp sesame oil
2 Tbsp sliced green onions (green part only)
1 roma tomato, 1/2 inch dice
1 Tbsp toasted sesame seeds
2 Tbsp chopped macadamia nuts
Seaweed (I used some nori)

Mix the fish with the soy sauce and sesame oil. Let it marinate in the fridge for an hour. Start off light and season more later if needed.

30 minutes before serving, add the rest of the ingredients, season to taste, and chill before serving. Don't add the ingredients too earlier otherwise the nuts will get soggy.

Saturday, April 5, 2008

No Knead Pizza Dough

No Knead Pizza Dough

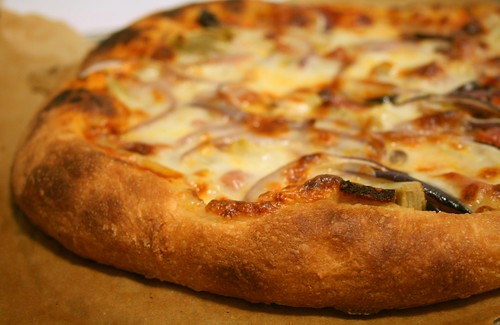
I used to hate pizza crust as a kid. I would dread getting to that barren outer ring of crust where there was no more sauce, cheese, or pepperoni to hide the dry and tasteless breadstick. As I got older, I realized the world of pizza extends beyond school cafeterias and nationwide pizza chains. I discovered specialty pizzas, where the crust is the best part! My attempts to make pizza at home never got very far until I got a baking stone about a year and a half ago. The baking stone transformed a flabby, limp crust into a crisp one. But the most important element of great pizza is the dough, and it is also the trickiest part. My idea of the perfect pizza crust is one that's crisp on the outside and has a good chew on the inside. The crust should be thin except around the edge where there should be big, bulbous air pockets. Oh how I love those giant air bubbles. I've made some pretty good doughs but I still wasn't satisfied. Then I had a stroke of genius. Why not use no knead bread for pizza dough. The high water content in the dough will create that really crisp crust and the long rise time means plenty of gluten development for the chewy interior and lots of good air bubbles, just what I was looking for. I started experimenting with this idea a few months ago. But as it turns out I wasn't the only one with this idea (a whole book about no knead breads? Now that's genius). What can I say, great minds think alike. ;) My recipe is based on Jim Lahey's original No Knead Bread recipe. This is by far the best pizza dough ever (and omigosh it requires no kneading!). It's taken time and practice, but I have to say, I make a darn good pizza.

No Knead Pizza Dough
mmm... look at that bubbly crumb

This is the original No Knead Bread Recipe:
3 C flour
1 1/2 C water
1/4 tsp instant yeast
1 1/4 tsp salt

For no knead bread, I use unbleached all purpose flour and that gets the job done. But for pizza dough, I want a really chewy finished product so I use bread flour, which has more gluten. Usually when I make No Knead Bread, I use a combination of 2 cups all purpose flour and 1 cup of white whole wheat flour (I like King Arthur Mills). Whole wheat flour is more flavorful to begin with (it's healthier too!) and the extra long rise and fermentation really brings out even more flavor. I wanted my pizza dough to benefit from the flavor boost of WW flour so I kept this ratio for the dough: 2 cups of bread flour (again I like King Arthur Mills) and 1 cup of white whole wheat flour.

I kept the water content the same, preserving the 2:1 flour to water ratio.

And I also kept the yeast amount the same.

The salt content of the original recipe fits my tastes perfectly. Because I would be adding sauce and toppings, I scaled it down a bit to 1 teaspoon. This also makes it easier to halve or double the recipe.

Now for some pizza dough additions:
I'm not sure if anyone else experiences this but it seems like No Knead Bread goes stale really quickly. After half a day the crumb, once moist and delicious, gets a little crumbly and funky (though a little toasting in the oven reverses the staling). I like to add olive oil to my pizza doughs, which adds a great flavor but also improves the texture and the additional fat protects against staling. I like to add 1 tablespoon for every cup of flour, which is a little more than most recipes, so in goes 3 tablespoons of olive oil.

Next I also like to add honey, which helps boosts the flavor of the dough and works especially well with the whole wheat flour. 1 teaspoon for every cup of flour, 1 tablespoon total but you can go up to 2 tablespoons.

So here's my final recipe:

No Knead Pizza Dough
adapted from Jim Lahey's No Knead Bread
makes 2 medium sized pizzas

2 C bread flour
1 C whole wheat flour, preferably white
1 1/2 C water, warm about 100 degrees F
1/4 tsp instant yeast
1 tsp salt (if you use kosher salt you will have to use more)
3 Tbsp olive oil
1 - 2 Tbsp honey

Dissolve the honey in the warm water. The water should feel tepid and slightly warm to the touch but not hot; hot water will kill the yeast. Whisk together the flour, yeast, and salt to evenly distribute. Add the warm water and olive oil and stir until the dough is well mixed. Cover the bowl with plastic wrap and let it rise at room temperature (optimal temp about 70 degrees) for 18 hours.

No Knead Pizza Dough
I made 1.5x the recipe and it looked like it was going to take over my kitchen.

No knead bread rises anywhere from 12 to 18 hours for the first rise, and then 1 - 2 for the second rise. For this pizza dough, I like to go for the full 18 hours to get maximum flavor and gluten development, then I let it rise for 2 - 3 hours for the second rise. Typically when I want to make pizzas for dinner, I start the dough the previous day at around 10pm. Then it let it rise all night and during the day when I'm at work. I get home at around 4pm when I shape it, then let it rise again until 7pm and then pizzas are done by 7:30, just in time for dinner. (If this time frame doesn't work for you, see my note about retarding the dough)

After 18 hours, flour your work surface, hands, and a bench scraper. Cut the dough in half. Handle the dough gently because if you're too rough, you will push all the hard earned air bubbles out of the dough. Gather all of the edges of the dough together, almost like a little pouch, and seal the seams. You will have a ball of dough. Brush any excess flour off your work surface to the side. You don't want too much flour on your surface for this step. Flip the ball of dough over so the seam is on the bottom. Flour your hands and lightly flour the sides of the dough. Then cup your hands, and shuffle the ball of dough back and forth between your hands in a circular motion. The bottom of the dough will grab onto the work surface and the circular motion will help the exterior of the dough pull taut and form a smooth surface. If there is too much flour on your work surface the dough will not be able to grab onto the work surface. Repeat this process with the second portion of dough. After you have formed the ball of dough, use a bench scraper to lift it off the work surface since it will be stuck, and transfer it to a floured area to rest. Loosely cover the dough with plastic wrap and let it rise again for 2 - 3 hours.

No Knead Pizza Dough

Take this time to make your pizza sauce and prep your toppings.

Adjust an oven rack to the lowest position, set the pizza stone on the rack, and preheat the oven to 500 degrees F or as high as your oven will go and preheat for 30 minutes before baking. Do not add a pizza stone to a hot oven or it will crack. Place the stone in the cool oven before you turn it on and then let it heat up with the oven.

If you don't have a pizza peel, like me, you can use a cookie sheet with no lip. I place a square piece of parchment directly on the cookie sheet and form the pizza on the parchment. This way I don't have to deal with scattering cornmeal on the cookie sheet which always makes a big a mess and ends up all over my kitchen floor.

When it's time to stretch your dough, oil your hands front and back. The oil will prevent the dough from sticking to your hands and it will also get rubbed onto the exterior of the dough creating a nice crispy crust. Take one ball of dough and gently flatten it. Form two fists and drape the dough over your fists. Let gravity pull the dough down as you turn it over your fists. Once you get a rough circular dough, place it over your piece of parchment. Even out the dough with the heel of your palm, make sure to not thin it out too much otherwise the dough will tear. Top with sauce and toppings but don't overwhelm the dough with too much stuff or it will get soggy.

Take the cookie sheet or pizza peel and slide the pizza with the parchment paper onto the baking stone. Bake the pizza for 7 - 10 minutes or until the crust is a crisp and golden brown and the cheese is spotty brown. After 5 minutes the bottom of the pizza will be baked and you can slide the piece of pachment out from underneath. This way the crust will be in direct contact with the stone and will crisp up better.

After the pizza has finished baked, take your pizza peel or cookie sheet and slide it underneath the pizza or use a pair of tongs and gently grab the crust and pull the pizza onto the peel/sheet.

Cool for 5 minutes before cutting and serving.


*note:
Not everyone has the option of getting home at 4pm from work so if you want to make this on a weeknight, one possibility (I have not tried this yet however) is to refrigerate the dough after shaping but before the second rise. You will also need to start the first rise earlier around 5 - 6pm and let it rise until the next morning and then shape it for the second rise, cover well and refrigerate. The cooler temperatures will retard the dough and it will continue to rise at a much slower pace. You can shape it early in the morning, retard during the day, and take it out 30 minutes in advance to let it come to room temperature, cold dough will tear too easily.

No Knead Pizza Dough
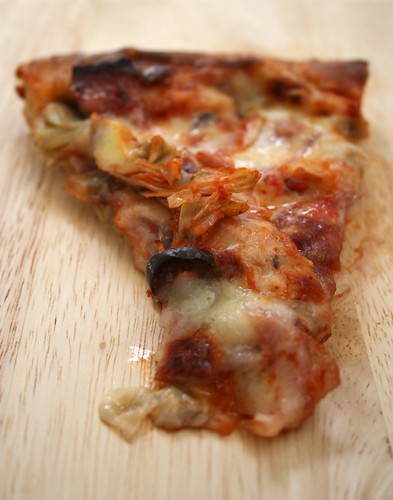
Salami, kalamata olives, and artichoke hearts. nomnomnom!

Simple Tomato Sauce
1 28 oz can whole tomatoes, packed in juice
2 Tbsp olive oil
3 cloves of garlic, minced
Salt and pepper
Fresh basil, chiffonade or torn into smaller pieces (if you have it)

Drain the tomatoes and puree them in a food processor or food mill. Add the garlic and olive oil to a cold unheated saucepan and place over medium heat. Let the mixture slowly heat up together. When the garlic starts to smell fragrant, add the tomato puree. Cook until it has thickened. Season with salt and pepper. Off heat stir in the basil.


A final note: I love making my pizzas with fresh mozzarella. If you have access to a Trader Joe's, they sell 1 pound logs of fresh mozzarella for only $5.

Wednesday, April 2, 2008

Halibut Cheeks on Mashed Yukon Gold Potatoes with Chive Oil

Halibut Cheek on Mashed Yukon Gold with Chive Oil
Last Friday Steven and I visited my favorite place in Seattle, Pike Place Market. We don't go there very often so I took the opportunity to splurge on all kinds of goodies. First we hit up World Spice Merchants, which is in my opinion Seattle's best spice house. If you live in the area and haven't been there you really owe it to yourself to go. They ground my allspice when I ordered it so it was as fresh as can be. Who knows how long that preground allspice has been sitting on that supermarket shelf? Next we perused the produce stands where I splurged on one, yes just one, blood orange. Along the way we tried some 25 year aged balsamic vinegar and some fig balsamic (both of which were simply amazing). We sampled some artisan chocolate pasta that you could eat dry and uncooked. Then off to the butcher for veal shanks ($12.90 a pound, ouch). Finally to the fishmonger, where the selection of seafood is just overwhelming: scallops the size of your palm, crimson fillets of king salmon, and fresh wild-caught halibut cheeks. At $16.99 a pound, there was definitely some hesitation, but I thought what the heck, it's still cheaper than dining out, so I got half a pound.

For the Chinese, the cheek is the most coveted part of the fish, prized for its sweet flavor and tenderness. Chopsticks gently pry this delicacy out from the cavity below the eyes and it is then offered to the guest of honor. The cheek of a typical steamed fish is a tiny morsel about the size of a raisin. However, the ginormous halibut will yield a behemoth of a cheek that are almost the size of a deck of playing cards. Eating a plate of only fish cheeks? It sounds too good to be true, almost wrong... yet so right.

I wanted to showcase the fish cheeks amazing flavor and texture so it required very little dressing up. This beautiful piece of fish requires no fancy sauce, just a little salt and pepper.The buttery taste of yukon golds pairs perfectly with the buttery fish. (I think the best mashed potatoes are made with yukon golds, russets are too bland and boring). The potatoes are topped with a little chive oil for the tiniest oniony kick and finally, a squeeze of lemon juice on the cheeks provides the perfect acidic note to counter the richness of the fish and potatoes.

Oh and what did Steven say?

"Hey guess what?" "We're eating haliBUTTCHEEKS. lol."

Halibut Cheeks with Mashed Yukon Gold Potatoes with Chive Oil

1/2 lb halibut cheeks
Salt and pepper
Roughly 2 Tbsp flour
1 Tbsp Butter

Mashed Yukon Golds
1 lb Yukon Gold Potatoes
3 Tbsp butter, cut into 3 pieces
Salt and pepper
(optional: 1/2 tsp lemon zest for lemon scented mashed potatoes)

Chive Oil
2 Tbsp chopped fresh chives
2 Tbsp olive oil (or more)

Lemon wedges for serving

First make the chive oil, finely mince the chives and mix with olive oil and set aside to infuse.

Scrub the potatoes and dig out any emerging roots. Leave the potatoes whole and place them in a saucepan and fill with about half an inch of water. Simmer until they can be easily pierced with a knife, about 15 - 25 minutes depending on the size of your potatoes.

Leave the heat on. After all the potatoes are tender (smaller potatoes will require less time than the larger potatoes), peel the potatoes, then put them through a potato ricer, a food mill using the coarse disc, or mash with a potato masher. A ricer or food mill will produce the fluffiest potatoes. Rice the potatoes back into or mash them directly in the hot pot back on heat for a minute to dry out the potatoes. Then using a rubber spatula, fold in 3 tablespoons of butter and season with salt and pepper (optional ingredient: add some lemon zest for lemon scented potatoes). Keep warm until serving.

Season the cheeks with a little salt and pepper then dredge them in flour, shaking off the excess. The cheeks cook very quickly, like scallops, and will only take about minute or two per side. Heat 1 tablespoon of butter in a nonstick skillet over medium heat heat. When the foaming stops, add the cheeks and cook until the first side is golden brown, 1 - 2 minutes. Flip over and cook the second side until golden brown, 1 - 2 minutes.

Place a mound of mashed potatoes on the plate, spoon some chive oil on top, and place the cheeks ontop of the mashed potatoes and squeeze some lemon juice on top. Serve immediately.

LinkWithin

Blog Widget by LinkWithin