Saturday, July 7, 2007

Kung Pao Shrimp

Kung Pao Shrimp

Kung pao chicken, gong bao ji ding is virtually on every Sichuan Chinese restaurant's menu. The difference between the classic Sichuan version and the Americanized version is in the use of Sichuan peppercorns. The Sichuan peppercorn imparts an unusual numbing and spicy sensation on the tongue, known as ma la, and is used extensively in many of the region's dishes; but these peppercorns are not used in the Americanized dish. One theory is that since the peppercorns were banned from the US from 1968 up until 2005, cooks had to create this dish without the peppercorns. However, the ban was only loosely enforced until 2002 (when they really started to crack down); before then, you could find the peppercorns if you knew where to look. So perhaps another reason is that the ma la sensation was excluded so the dish could cater more to Western tastes. Now thanks to new heat treatments to kill the citrus canker, the peppercorns can now be legally purchased. So no more smuggling them from Canada or under-the-table dealings with your local Chinese restaurant. ;)

Fuchsia Dunlop's recipe was really excellent. It was so refreshing to see that the food wasn't swimming in a pool of cloyingly sweet and goopy sauce. The flavor was great and there was just enough sauce to cling to the food. I used shrimp rather than the chicken used in the traditional dish. The only problem I encountered was with the peppercorns. I wasn't sure if I should remove the peppercorns after frying them in the hot oil. Chomping down on a peppercorn while eating the dish was very unpleasant. I would suggest either use 1 tsp and fry them in hot oil to first perfume the oil, them remove them before cooking the rest of your dish or if you'd rather not deal with the hassle of removing them from the hot oil, use 1/2 tsp and crush them up into smaller more manageable size pieces. this way it doesn't completely overwhelm your palate when you bite down on a piece.

Notes:
- The recipe can also be made with cubes of chicken or pork
- The original recipe does not call for any vegetables but I figured it couldn't hurt since veggies are good for you! If you are adding a significant amount of vegetables you may need to double the sauce.

Kung Pao Shrimp
Adapted from Fuchsia Dunlop's Land of Plenty

1 lb of large shrimp, peeled and deveined
3 garlic cloves and equivalent amount of ginger
5 scallions, white part only
2 Tbsp vegetable oil
About 10 dried red chilies
1 tsp or 1/2 tsp whole Sichuan peppercorns (see note)
2/3 C roasted peanuts or cashews

Optional:
A few ribs of celery, chopped
Half a red bell pepper, chopped
Broccoli stems, chopped or slivered

Marinade
1/4 tsp salt
2 tsp soy sauce
2 tsp Shao Xing rice wine
1 tsp corn starch

Sauce
2 tsp sugar
1 tsp cornstarch
1 tsp dark soy sauce
1 tsp light soy sauce
3 tsp Chinese black vinegar
1 tsp sesame oil
1 Tbsp chicken stock or water

1. Mix the ingredients for the marinade together, toss with shrimp, and let sit in the fridge while you prepare the rest of the recipe.

2. Peel and thinly slice or mince the garlic, mince the ginger, and chop the scallions. Cut the chilies in half and discard as many seeds as possible.

3. Mix all the ingredients for the sauce in a small bowl and set aside.

4. Add 2 tablespoons of oil to a wok or skillet. When the oil is hot add the chilies and peppercorns and fry for a few seconds until they are fragrant (take care not to burn the peppercorns, lower the heat if you need to, shorten the frying time if you're using crushed peppercorns). Add the shrimp (and any vegetable if using) and fry for about 30 seconds then add the green onions, garlic, and ginger. When the shrimp is almost fully cooked, add the sauce (stir it a little to recombine) and cook until the sauce is thick and shiny and the shrimp is cooked through.

5. You can mix the peanuts/cashews in or scatter them on top.

Links:
Another great idea from Jaden: make your own Sichuan peppercorn salt. You can probably use this and sprinkle it on the dish.

Wednesday, July 4, 2007

Green Tea Ice Cream

Green Tea Ice Cream

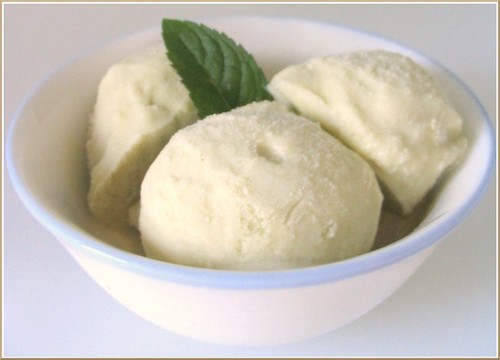
Ever since I bought my ice cream maker back in February, I have a mile long list of ice cream flavors I want to make this summer. Now that I finally got a copy of "The Perfect Scoop" that list has tripled, maybe quadrupled. I'm jumping on the bandwagon a little late here but man that book is a-ma-zing! When Meeta announced the theme for this months Monthly Mingle, I had a hard time deciding which ice cream flavor to make. I finally settled on green tea ice cream (and whatdoya know David has a recipe for it!) with the intention of wrapping them in mochi, ala Mikawaya. Unfortunately, the mochi making turned out to be a disaster. It stuck everywhere and to everything. I could not get it off my hands let alone wrap it around ice cream. They weren't kidding when they said that stuff is sticky. (I read that not even the Heimlich can dislodge it!) Thankfully the ice cream was delicious so I didn't dwell long on the failed mochi.


Green Tea Ice Cream

Notes:
- I changed the milk/cream ratio because I didn't have enough cream and I felt almost guilty using as much as the recipe suggested, though I'm sure it would have made the ice cream even more delicious! I stuck with the recommended number of egg yolks, though I only had extra large eggs so the end result was a tad eggy, but again it was really delicious so no complaints.
- I also divided the recipe in half
- And since my matcha was ancient, I had to increase the amount from the recipe's 2 tsp and regrettably I didn't achieve the brilliant green of the photographed ice cream in the book.

Green Tea Ice Cream
Adapted from David Lebovitz "The Perfect Scoop"

3/4 C milk
3/4 C heavy cream
3 egg yolks
6 Tbsp sugar
2 tsp matcha powder
1/8 tsp salt

Heat the milk and salt in a saucepan over medium heat until it is hot but not boiling. Meanwhile, whisk the egg yolks with the sugar until it's pale yellow and ribbony.

Anchor your mixing bowl by placing a damp kitchen towel around the base of the bowl. Slowly drizzle in the hot milk into the egg yolks while whisking continuously.

Return the custard mixture into the saucepan and heat over medium heat. Stir continuously with a heatproof spatula while making sure to scrape the bottom. Cook until the mixture is thick enough to coat the spatula and a line drawn across the back of the mixture on the spatula stays clear. If the line blurs then continue to cook it a little longer. Don't boil the custard.

Add the matcha powder to the heavy cream then slowly whisk into the custard. Whisk the mixture until all the matcha powder has dissolved.

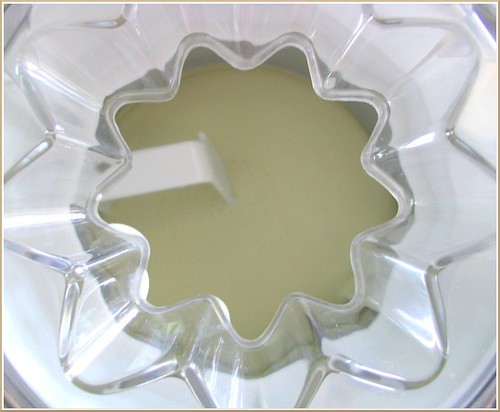
Chill in the fridge for a few hours. Then freeze in an ice cream maker according to the instructions.


Sunday, July 1, 2007

Mile High Buttermilk Biscuits and Sausage Gravy

Mile High Buttermilk Biscuits

I first made these biscuits for Thanksgiving last year and hands down they are the best biscuits ever. Gone are the days of buying tubes of preservative-laden, artificially flavored biscuit dough, though I must say I miss the entertaining “pop” of opening those cylinders. These crispy on the outside, soft and fluffy on the inside biscuits are absolutely delicious on their own or smothered in sausage gravy.

Mile High Buttermilk Biscuits
From Cook’s Illustrated

2 C flour
1 Tbsp baking powder
1 Tbsp sugar
1 tsp salt
1/2 tsp baking soda
4 Tbsp unsalted butter
1 1/2 C buttermilk
Additional flour
2 Tbsp melted butter

Preheat oven to 500ºF. Spray a 9 in springform or cake pan with some nonstick spray.

Add flour, baking powder, baking soda, sugar and salt to a bowl and mix the ingredients together evenly. Using a fork or pastry blender, cut in the butter until the pieces are no bigger than a small pea. Fold in the buttermilk until everything is just blended, and there are no streaks of flour remain. Do not overmix, the mixture should still be lumpy.

Line a plate or tray with some flour and using a 1/4 C measuring cup or 1/4 C ice cream/cookie scoop, scoop out balls of the dough onto the tray of flour. Flour your hands and roll each ball around in the flour to evenly coat them in a layer of flour. The dough is very wet and very sticky. Place the dough balls into the prepared pan. Place 9 balls around in a ring and 3 balls in the center of the pan. Brush the tops of the biscuits with melted butter.

Bake for 5 minutes at 500ºF (middle rack) and then lower the temperature to 450ºF and bake for another 15 minutes.

In the past I've always baked these in a cake pan or springform. Alternatively you can also bake them individually in a muffin pan which is what I did this time because I’m waiting for my newly ordered cake pans and springform to arrive. I baked these on the upper middle shelf and at 450ºF for the entire time of about 17 minutes.

LinkWithin

Blog Widget by LinkWithin