Tuesday, December 23, 2008

Oatmeal Power Bars

The snow is all fun and games until you realize there's 8 inches of it to shovel out of the driveway. While Steven painstakingly cleared the driveway, I made myself useful by building a snowman. Standing at a majestic 4 foot something tall, he's the greatest snowman I've ever made.

Season's Greetings
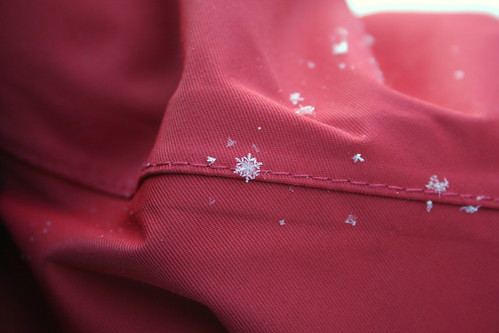
My favorite part is his nose, which is a giant icicle instead of the usual carrot. Gives him the same sort of look, except 10x cooler (wow that was sooo unintended... gotta love crappy cold weather puns).

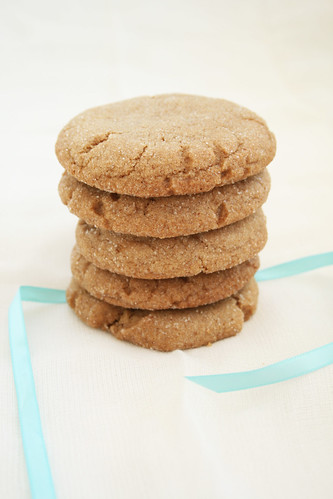
After the last few days of playing in the snow, I realized I've fallen ridiculously behind on making all of my holiday food items. I was supposed to get my 12 days of cookies done by tomorrow but right now, it's not looking good (6 cookies posted and 2 days to go?). But a friend said Christmas isn't just a day, it's a whole season that goes until January. I guess it's true, it's not like the holiday baking stops after Christmas. In the spirit of holiday baking I'll keep these cookies coming at my unreliable sporadic pace.

I just finished making my last official present last night (which I will post about later because the recipient reads this blog). Now I have a crapton of other things to make for Christmas, that is, if the car can make it out of the driveway. On the list: hot chocolate mix, marshmallows, aebleskiver mix, stollen with candied orange peel and rum raisins (soaking in rum right now), and chocolate chip cookies for the neighbors that lent us their snow shovel.

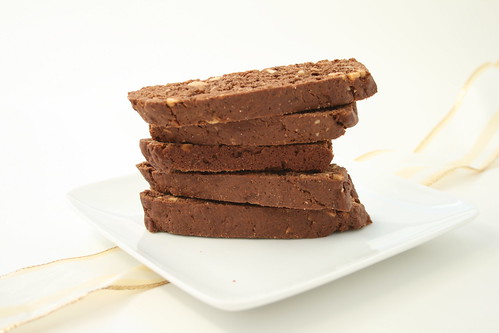
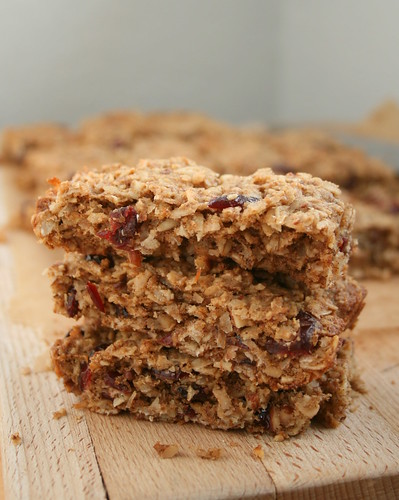
These oatmeal power bars are supposed to be a homemade imitation of these Costco oatmeal bars that Steven's dad likes so much. Last time I was at their house, I briefly glanced at the mile-long ingredient list for the bars - butter, oil, oats, brown sugar, coconut, nuts, dried fruit, and flax are the few I could remember. I bought a bag of ground flax seed from Trader Joe's for the sole purpose of trying to recreate the bars. Although I knew the majority of the correct ingredients, without the right amounts, I ended up just tossing stuff together. I obviously haven't mastered the skill of remaking food items because my bars were not like the Costco bars, still tasty in their own right, but not the same. Mine were so crumbly, a quarter of the bars disintegrated while I was cutting them and turned into trail mix.

To make them healthier, I could try cutting down on the butter and oil, maybe replacing some of it with applesauce, replace the brown sugar with honey or agave nectar, and up the flax and nuts.

Oatmeal Power Bar
Oatmeal Power Bar
makes 24 bars

1/2 C almonds, toasted
1/2 C pecans, toasted
1 C dried cranberries
1/2 C whole wheat flour
1/4 C ground flax seeds
1 tsp cinnamon
1/2 tsp baking soda
1/4 tsp salt
2 C rolled oats (old-fashioned or quick cooking both work)
1 C sweetened shredded coconut
1/2 C (or 1 stick) unsalted butter at room temperature
1/4 C canola or vegetable oil
1/2 C dark brown sugar
1 large egg
1 tsp vanilla

Preheat the oven to 350 degrees F. Line a 9 x 13 jelly roll pan with parchment paper.

If your almonds and pecans are not toasted, spread them on a baking sheet and toast for 10 - 15 minutes at 350 degrees F, or until the skin has darkened slightly and the nuts smell fragrant. Set aside to cool. After they are cool, chop roughly by hand or pulse them in a food processor.

Pour 1 cup of hot water over the dried cranberries and let them rehydrate for 5 minutes and drain.

Meanwhile, in a bowl, whisk the flour, ground flax, cinnamon, salt, and baking soda together. In another bowl, whisk the rolled oats, coconut, and chopped nuts.

With a stand mixer and paddle attachment or hand mixer, beat the butter until creamy and fluffy. Add the sugar, oil, and vanilla and beat again until creamy and fluffy. Add the egg and beat until the mixture is smooth. Add the flour mixture and beat until evenly combined. Then add the oat mixture and dried cranberries and mix until the dough is evenly incorporated.

Scrape the dough into the lined jelly roll pan and press the dough onto the pan with your fingers. Cover the dough with another piece of parchment and using a small rolling pin or empty wine bottle, roll over the parchment until the dough is evenly packed in the pan. Remove the top piece of parchment. Bake at 350 degrees for 15 - 20 minutes or until the edges are browned, the entire top is golden, and the center of pan is baked. You can use a toothpick to poke the middle to make sure it's not still gooey.

Run a knife along the edge of the pan to loosen the cookie from the pan. When the pan has cooled with room temperature, transfer the entire sheet of cookie to a cutting board (the easiest way to do this is to place the cutting board right next to the pan then use the parchment paper overhang as handles and slide the whole thing onto the board). Cut the sheet in half width-wise, then each half into quarters, and then cut each quarter into 6 bars. You should get 24 bars, give or take a few that will fall apart.

Saturday, December 20, 2008

Chocolate Hazelnut Biscotti

Snow Day
When it snowed last Thursday, Steven thought it was a better idea to stay home instead of going to work.
Snow Day
We debated whether to use the trash can lid or CSA box to go sledding down the hill. Eventually, we decided both were a bad idea. Seattle pretty much falls apart when it snows-schools close at the mere prediction of snow, the bus system goes down the pooper, cars start sliding everywhere-it's a mess. Probably because we have insane hills and maybe 1 or 2 snow plows.

crazy Seattle hills
Replace the power lines with ski lifts and you have yourself a nice slope for skiing (except that you can be blindsided by cars coming down the cross streets... that would be a problem).

Rosemary
We stopped to smell the rosemary, which grows like crazy around here. Our neighbors have a huuuge bush of it.

Snowflakes
I never realized that snowflakes actually look like... snowflakes! I always thought those 6 pointed paper cutouts you see taped on windows around this time of year were idealized versions of what snowflakes could look like. Snowflakes don't actually look like that right? Kinda like how a heart shape doesn't quite look like a real heart. We usually get the amorphous clumps of snow crystals here so this was the first time I've seen these large, beautiful snowflakes.

Snowflakes
I could have stood there all day taking pictures of the snowflakes that fell on Steven because as cliche as it sounds, each one was unique and absolutely perfect. But eventually I could no longer feel my toes so it was time to go home and have some hot chocolate and biscotti.
Snowflakes
Since my last biscottis turned out so well, I decided to try another biscotti recipe from Dorie's book and as expected, they were just as good.

Chocolate Hazelnut Biscotti

Chocolate and Hazelnut Biscotti
Adapted from Baking by Dorie Greenspan

3/4 C hazelnuts
2 C all purpose flour
1/3 C cocoa powder
2 tsp espresso powder
1 1/2 tsp baking powder
1/2 tsp salt
4 Tbsp unsalted butter, melted
2 Tbsp vegetable or canola oil
3/4 C sugar
1 tsp vanilla extract
2 large eggs

Preheat the oven to 350 degrees F. Place the hazelnuts in a baking pan and toast for 10 - 15 minutes, or until the nuts are golden and smell fragrant and the skin has darkened and blistered. Pour the nuts onto a towel and wrap them up in the towel so they can steam. After 2ish minutes, rub the nuts together in the towel to remove any loose skins. Transfer the nuts to a bowl and cool completely. Chop them roughly with a knife or pulse them briefly in a food processor.

In a large bowl, whisk together the flour, cocoa, espresso powder, baking powder, and salt.

In another bowl, whisk together the melted butter, oil, sugar, and extracts until smooth. Add one egg, whisk until smooth, then add the second egg and whisk until smooth. Then add the flour mixture and chopped nuts and mix until no streaks of flour remain.

Line a baking sheet with parchment paper or a silicone baking mat. Scrape half of the batter onto the baking sheet and shape it into a rectangle 3 inches wide, 10ish inches long, and about 3/4 inch tall. Do the same with the remaining batter, spacing the loaves 4 inches apart. Bake at 350 for 20 - 25 minutes, or until the loaves are baked in the middle but still somewhat soft and springy.

Remove the pan from the oven and cool the loaves until they can be handled. Lower the oven temperature to 300 degrees F. Using a sharp knife, slice the loaves on a slight diagonal into roughly 1/2 inch slices (as thick or thin as you want). Stand the sliced biscotti up on the baking sheet like dominos and bake at 300 degrees F for another 20 - 30 minutes, or until they are dry and firm throughout.

Cool to room temperature and store in an airtight container.

Friday, December 19, 2008

Brown Butter Gingersnaps

Brown Butter Gingersnaps
This cookie is a cross between last year's brown sugar cookie and gingerbread. The brown butter gives what would be a traditional gingersnap a wonderful lingering caramely aftertaste. I kept them on the chewy side so gingersnap is a bit of a misnomer but gingerchew doesn't quite have the same ring. And as with all chewy cookies, keep them a little underbaked so the cookies retain their chewiness after they cool. If you like crisp cookies, a true gingersnap, bake these cookies longer. The spices are adjustable so play around with them to suit your tastes.

Brown Butter Gingersnaps
makes approximately 18 cookies

1/2 C unsalted butter (1 stick)
3/4 C dark brown sugar
1/4 C unsulphured molasses
1 large egg
1 tsp vanilla extract
1 1/2 C all purpose flour
1/2 tsp baking soda
1/4 tsp salt
1 1/2 tsp ground ginger
1 tsp cinnamon
1/8 tsp allspice (optional)
1/8 tsp ground nutmeg *Spices are adjustable to suit your tastes
1/4 C granulated sugar for coating

Put 6 tablespoons of butter in a saucepan and heat over medium heat. Cook the butter until the foaming and bubbling subsides and the solids start to brown, stirring occasionally. The butter will start to smell really, really good. Take the butter off heat and continue to stir until the solids are an even brown (not too dark). If you're afraid of burning the butter, err on the side of caution. Add the remaining 2 tablespoons of butter to stop the cooking. Set aside to cool.

In a separate bowl, whisk together the flour, spices, baking soda, and salt until evenly combined.

When the butter is cool, stir in the brown sugar, molasses, egg, and vanilla. Whisk to evenly combine. Add the dry ingredients and mix until no streaks of flour remain.

Preheat the oven to 350 degrees F. Chill the dough for 15 - 30ish minutes, or until you can handle it without the dough sticking too much to your hands.

In a shallow bowl, add roughly 1/4 C of granulated sugar.

Take roughly 1 1/2 tablespoons of dough and roll it into a ball. Then roll it in the bowl of sugar to cover. Place on baking sheet. Space the cookies 2 inches apart. You should get around 18 cookies. Flatten them with the bottom of a drinking glass until they are between 1/4 inch and 1/2 inch thick. For chewy cookies, bake at 350 degrees for 10 - 12 minutes, or until the edges are cooked but the center is still soft. *Bake them longer if you want crispy cookies.

Transfer to a rack to cool.

Wednesday, December 17, 2008

Almond Biscotti

Almond Biscotti
Toooo many cookiesss... I'm forced to eat cookies for breakfast. It's a tough situation to be in.

I kid, I kid! Cookies (currently, four different kinds to choose from) with my morning coffee is a welcomed side effect of massive holiday baking. The biscottis I made this year are better than the ones I made last year. While not as festive looking, they are much easier to bite through and require no dunking in liquid. The difference is the addition of butter and oil and more baking powder. Biscotti with butter/oil won't keep as long as biscotti without the extra fat but they are more flavorful and the cookies will be gone so quickly, storage won't be an issue.

Almond Biscotti
Adapted from Baking by Dorie Greenspan

1 1/2 C all purpose flour
1/2 C yellow cornmeal
1 1/2 tsp baking powder
1/4 tsp salt
4 Tbsp (half stick) butter, at room temperature
2 Tbsp vegetable or canola oil
3/4 C granulated sugar
2 large eggs
1 tsp almond extract
1/2 tsp vanilla extract
3/4 C almond slivers or chopped almonds, toasted

Preheat the oven to 350 degrees F. Line a baking sheet with parchment paper or a silicone baking mat.

Toast the chopped almonds or almond slivers in the oven or stove top. If you are using whole raw almonds, toast them first before chopping. If using the oven: toast them on a tray at 350 degrees for 5 - 10 minutes, shake occasionally until fragrant and golden. On the stovetop: place the almonds in a skillet over medium heat, shake frequently until the almonds are fragrant and golden. Set aside to cool.

In a bowl, whisk together the flour, cornmeal, baking powder, and salt.

In another large bowl, add the butter, oil, and sugar and whisk until smooth. Add the extracts and one egg, whisk until smooth before adding the second egg.

Add in the dry ingredients and almonds and mix until no streaks of flour remain.

Scrape half of the dough onto one side of the prepared baking sheet. Shape the dough into a rectangle about 2.5 inches wide, roughly 10 - 12 inches long, and 3/4 inch high. Do the same with the other remaining half of dough. Bake for 20 - 30 minutes, until the logs are golden brown on top but still soft to the touch. Remove the pan from the oven and cool the logs until they are cool enough to handle.

Turn the oven down to 300 degrees F. Slice the logs at a slight angle into slices about 1/2 - 3/4 inches thick. Stand the cookie up like dominoes on the baking sheet. Bake for another 20 - 30 minutes or until the cookies are firm and dry. Transfer to a cooling rack and cool to room temperature.

Monday, December 15, 2008

Chocolate Olive Oil Crinkle Cookies

Almond Biscotti and Chocolate Crinkle Cookie

I was hoping these cookies would spread a little more in the oven so the cracks would be more well-defined. I was not impressed when I took them out of the oven but I changed my mind after I tried one of them. Leave them a little underbaked and they will taste rich and chocolately like a brownie bite. Chocolate and olive oil work surprisingly well together. Choose a fruity olive oil for these cookies and it will enhance the intense chocolate flavors. And for the health conscious, these cookies, made with heart-healthy dark chocolate and olive oil, are actually good for you! The olive oil is a big selling point with Steven's mom because I know she's scared of all the butter I use in my baking.

Chocolate Crinkle Cookies
Chocolate Olive Oil Crinkle Cookies
makes 1 dozen cookies

2 oz. dark chocolate, chopped
2 Tbsp fruity olive oil
1/2 C granulated sugar
1/4 tsp instant espresso powder (optional)
1/2 tsp vanilla extract
1 egg
1/2 C + 2 Tbsp all purpose flour
1/2 tsp baking powder
1/4 tsp salt

For decorating
1/4 C confectioner's sugar

Melt the dark chocolate in a heat proof bowl, either using a double boiler or in the microwave. Set aside to cool slightly. Meanwhile, in a separate bowl, whisk the flour, baking powder, and salt together.

Add the olive oil, sugar, and instant espresso powder to the chocolate and whisk to combine. Add the egg and vanilla extract and mix again.

Add the flour mixture to the wet ingredients and mix until the flour is just incoporated. Chill the dough for at least 2 hours.

Preheat the oven to 325 degrees F. Line a cookie sheet with parchment paper or a silicone baking mat. Add the confectioners sugar to a shallow bowl.

Use a spoon to roll a tablespoon of the dough into a ball. Roll the ball in confectioner's sugar, make sure to cover all the sides. After all of the dough is rolled and covered in sugar, use the bottom of a drinking glass to flatten the balls slightly.

Bake for 8 - 10 minutes, rotate the baking sheet 180 degrees halfway into baking. The cookies will crack in the oven. When they are ready, they shoudl still look shiny and slightly wet in the cracks. Transfer the cookies to a rack to cool.

Green Tea Spritz Cookies

Green Tea Spritz Cookies
Exams are over and I can finally start my holiday baking. I planned to do the 12 days of cookies again this year but I'm running out of days before Christmas! I hope no one objects to two recipes today so I can catch up.

My original idea was to make green tea Christmas tree spritz cookies. Instead of using green food coloring, I was hoping matcha powder would give the cookies a natural green shade. Sadly, my Christmas tree cookie press disc was nowhere to be found so I used the wreath/flower disc instead (it's probably a flower but let's pretend it's a wreath). My green tea powder is technically not real matcha, instead it's a weaksauce green tea beverage powder so I had to use 3x (3 tablespoons!) what I normally would if I had matcha. Even with extra powder, the cookies only tasted faintly of green tea and instead of the lovely emerald colored cookies I envisioned, my cookies looked seasick with a sickly green tinge. Not exactly what I was hoping for but they're terribly addicting, with each cookie being bite sized, I easily ate half a dozen in one sitting.

I've written the recipe to call for a healthy dose of matcha but feel free to scale down if you want a more subtle green tea taste. The key to working with a cookie press is to use cool, ungreased cookie sheets. Do not use nonstick cookie sheets, parchment paper, or silicone baking mats because the dough won't stick. After baking, use a spatula and run it under all of the cookies before they cool, otherwise the cookie will stick to the cookie sheet when they cool and it will be nearly impossible to get them off. If you don't have a cookie press, you can use a pastry bag with a large star tip and pipe the dough into various designs.

Green Tea Spritz Cookies
makes nearly 5 dozen cookies with a cookie press

1 Tbsp matcha (green tea) powder
1 Tbsp hot water
1 1/3 - 1 1/2 C all purpose
1/2 tsp baking powder
1/4 tsp salt
1/2 C unsalted butter at room temperature (1 stick/4 oz.)
1/2 C granulated sugar
1 large egg yolk
1/2 tsp vanilla extract
1/4 tsp almond extract

Preheat the oven to 350 degrees F.

Dissolve the matcha powder in hot water and set aside to cool.

In a bowl, whisk 1 1/4 cups of all purpose flour with the baking powder and salt. Set aside the remaining flour to add as needed to the dough later.

Cream the butter in the bowl of a stand mixer or with a hand mixer until fluffy. Add the sugar, egg yolk, vanilla extract, almond extract, and dissolved matcha. Beat until evenly mixed and fluffy.

Add the flour, baking powder, and salt mixture to the ingredients in the mixer bowl and mix until the flour is just incorporated. The dough should look shaggy and somewhat fluffy. If it is too wet, add a little more flour.

Load the dough into the cookie press barrel and press the dough onto a cold, ungreased cookie sheet.

Bake for 8 - 12 minutes or until the cookies are lightly golden brown around the edges. Rotate the cookie sheet 180 degrees halfway through baking. After removing the cookies from the oven, run a spatula under all of the cookies to separate them from the cookie sheet. Cool the cookies on the sheet.

Cool and rinse off the cookie sheet before each batch.

LinkWithin

Blog Widget by LinkWithin