Pages

Tuesday, March 31, 2009

not-so-secret Chili

Chili
Spring break is sadly over, but it was a fantastic two weeks filled with lots of cooking and baking. The freezer had to be cleaned to make room for food I froze for the upcoming quarter. One thing I made was a big batch of chili since it keeps so well, perfect for when we need emergency sustenance.

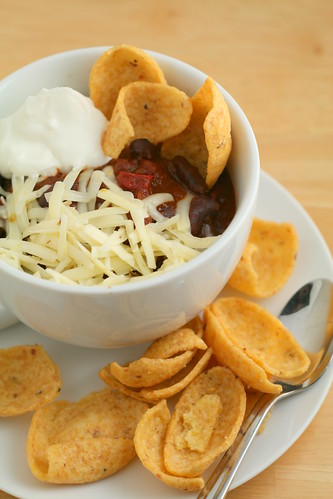
I haven’t upgraded to making homemade chili powder from whole peppers because I have this giant container of chili powder I got from Costco years ago. I know, I know you’re supposed to throw away spices after 1 year but I can’t bear to do it! It’s still good, I swear! *Note to self*: no more buying spices at Costco even if it’s dirt cheap unless I plan on having it for decades. I probably won’t be making my own chili powder even after I use this stuff up because I’m just too lazy. To make my ancient chili powder more flavorful, I spike the chili with chipotle chilies, extra cumin and oregano. This time I thought I’d make my regular chili a little more interesting. Instead of using ground beef, I used a chuck roast that I cut into small pieces. I was trying to make it more authentic but all attempts at authenticity were moot after I added beans. Oh well, I can’t help it; I kinda like chili with beans, not too much, just a little. I also added some secret-but-not-so-secret-because-everyone-knows-about-them ingredients: coffee and chocolate. I opted not to add peanut butter and/or banana (I'm not that adventurous). Finally, after simmering for 2 hours, Steven and I added some of our favorite chili accompaniments, sour cream, cheese, and Fritos!

Chili v2.0

2 pounds chopped chuck cut into half inch cubes or lean ground beef
1 large onion
2 Tbsp chili powder
1/2 tsp whole cumin
2 – 3 chipotle chilies in adobo, minced (use less chilies and remove the seeds for a milder chili)
2 Tbsp tomato paste
1 Tbsp adobo sauce from chipotle chilies
3 cloves garlic
1/2 tsp oregano
1 large red bell pepper
1 14 oz can of chopped tomatoes
1/2 tsp espresso powder
1/2 tsp cocoa powder
1 28 oz can of dark red kidney beans
To taste:
Freshly ground pepper
Salt to taste
Cayenne

Serve with optional condiments: lime, shredded cheese, sour cream, corn chips

Heat a tablespoon of oil over medium high heat in a Dutch oven or large pot. Brown the beef in batches, first add 1/3 of the beef and cook until browned. Take out the beef and set aside in a large bowl. If a lot of browned bits have accumulated on the bottom of the pan, add some water to scrape those up and pour this flavorful liquid over the browned beef that you set aside. Add some more oil and repeat the browning process with the rest of the beef.

After all of the beef has been browned, add some water and scrape off any browned bits that have accumulated on the bottom of the pot and pour the liquid into the bowl with the beef.

Add 2 teaspoons of oil and add the onions and a large pinch of salt and cook over medium heat until the onions are translucent.

Add the cumin and chili powder and toast the spices until they are fragrant. Add the minced chipotle peppers, adobo sauce, tomato paste, garlic, and lots of freshly ground pepper until the garlic is fragrant. Add the bell peppers, can of tomatoes, oregano, browned beef and juices, cocoa powder, espresso powder. Simmer this mixture for 1 hour with the lid slightly ajar. While it’s simmering, add cayenne to taste and salt, keeping in mind the chili will continue to reduce. If the chili gets too dry, add some water. Then add the beans and simmer for another 30 minutes to 1 hour, or until the beef is tender.

Saturday, March 28, 2009

Mac and Cheese

Mac and Cheese
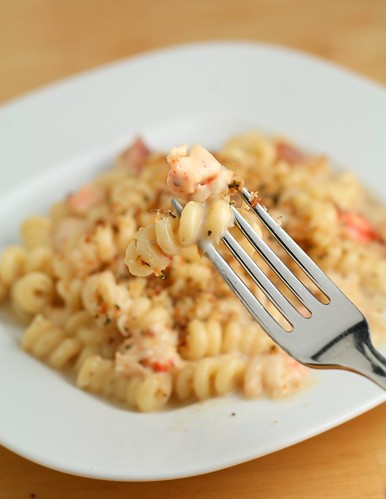
I’m a sucker for interesting pasta shapes. Even though the pantry is currently overflowing with pasta, I couldn’t pass the Barilla sale display without picking up a box of this cool pasta shape. Fusilli bucati corti are spring shaped noodles with a hollow center - way more interesting than rotini or regular fusilli. Now that I think about it, I don’t think I’ve ever used elbow macaroni for mac and cheese. It's just too boring.

I like making mac and cheese on the stovetop because I can control how cooked pasta is and keep the sauce from curdling. I've had sauce curdle on me in the past, which was so not tasty, and it's something I've been paranoid about ever since. I do miss seeing the mac and cheese come out all bubbly and browned from the oven with the toasty bread crumbs on top but it's a sacrifice I've come to terms with. Plus, we don't have a dishwasher and it's one less dish to wash. I just toast some bread crumbs with a little butter and some herbs either in a skillet or in the toaster oven; it's not the same but it's good enough.

The most important thing about mac and cheese is the cheese. Duh. Always use freshly grated cheese because the preshredded stuff is coated in questionable "non-clumping" agents that makes the sauce grainy. Today I used a combination of extra sharp white cheddar and some Parmesan but in the past I've used combination of Cheddar, Monterey, and/or Gruyere. I finished it off with a little splash of white wine, something I borrowed from cheese fondue recipes. Feel free to be creative with the extras. I recently picked up a bag of cooked and shelled langoustines from my local TJ's, which I'm guessing are like mini lobsters or crawfish? I threw some of those in but they are totally optional. You can use kielbasa, ham, Dungeness crab, or leave it plain. I tried to convince Steven to let me put some peas in but that endeavor was immediately shot down.

Mac and Cheese
serves 2 - 3 as entree, 3- 4 as appetizer

8 oz. pasta of your choice
3 slices regular or 2 slices thick cut bacon, cut into thin strips
1 shallot, minced
2 Tbsp flour
1 1/2 C milk, preferably whole
1 Tbsp Dijon mustard
4 oz cooked langoustines or whatever extras you feel like adding
Freshly ground black pepper
A little grating of nutmeg (optional)
1/4 tsp cayenne (optional)
2 C shredded extra sharp Cheddar
1/2 C shredded Parmesan or Gruyere
Salt

Cook the pasta according to your tastes for mac and cheese, al dente or soft, up to you.

While the pasta is cooking, start the sauce. If the pasta finishes cooking before the cheese sauce, drain the pasta and set it aside.

In a large saucepan or Dutch oven, cook the bacon over medium heat until most of the fat has rendered and it is beginning to crisp. Add the minced shallot and some salt and cook until the shallots have softened.

Add the flour and cook the flour until it is golden brown. Slowly drizzle in the milk while whisking. Make sure to whisk out all the clumps of flour.

Add the langoustines, Dijon, black pepper, nutmeg and cayenne if using, and whisk the bechamel until it has thickened and is bubbling. Stir in the white wine and turn off the heat.

Wait until the bechamel is no longer bubbling to add the cheese. Whisk until the sauce is smooth and then salt to taste. Stir in the pasta and serve.

Tuesday, March 24, 2009

Chicken and Basil Stir Fry

Chicken and Basil Stir Fry

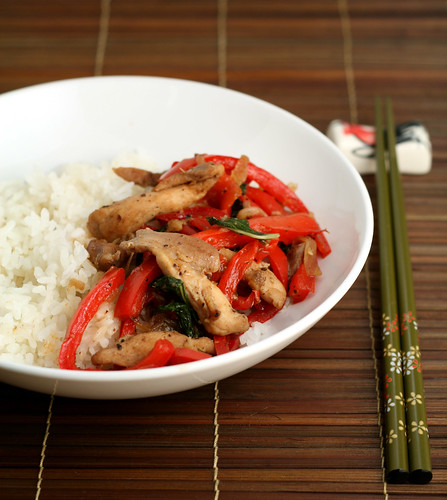
I never understood why so many people like white meat over dark meat. White meat is so bland and boring and ridiculously easy to overcook. Dark meat on the other hand, is succulent and flavorful, nearly impossible to overcook, and actually tastes like chicken. Oh well, to each his own! It works out better for us dark meat lovers anyway because thighs and drumsticks are always cheaper than breasts. But no worries, this stir fry is delicious no matter what kind of chicken you like. Just be more careful about the chicken drying out if you're using a breast or tenderloin cut.

I'm trying to post more student-friendly, easy/quick to cook recipes. Do you guys think a recipe like this would qualify? The ingredient list isn't terribly long and most of them aren't hard to come by. Prep and cook time was maybe 30 minutes?


Chicken and Pepper Stir Fry with Basil

1 pound chicken thighs or breast sliced into strips or slivers
1 large red bell pepper sliced
1 large shallot, thinly sliced
2 cloves garlic, minced
1 tsp grated fresh ginger
1 Tbsp soy sauce
2 Tbsp fish sauce
2 tsp brown sugar
1 - 3 Thai red chilies, seeds removed and thinly sliced or sub some jalapenos(to taste)
1/2 tsp freshly ground black pepper
1 C fresh whole basil leaves (sweet or Thai varieties are both okay)
1 Tbsp vegetable oil for stir frying
Fresh lime juice (optional)

*Note: if you use a rice cooker, start cooking your rice first.

In a small bowl, mix the fish sauce, soy sauce, and brown sugar.

Heat 1 tablespoon of vegetable oil in a nonstick skillet over medium heat and add the shallots. Cook the shallots until they are translucent and soft, about 3 minutes. Turn the heat up to medium high and add the chicken, bell peppers, grated ginger, minced garlic, ground pepper, and sliced chilies. Continue to stir fry until the chicken is nearly cooked through, about 2 minutes, then add the sauce. Cook for another minute and the sauce will thicken. Add more soy sauce or salt if you need to. Stir in the fresh basil at the end. Squeeze a little lime juice on top if you have some limes on hand. Serve over steamed rice.

Sunday, March 22, 2009

Chinese Tea Egg

Chinese Tea Egg

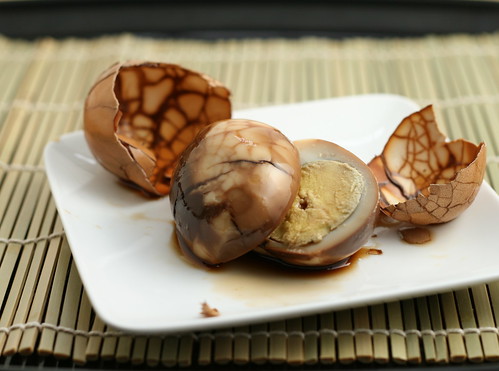
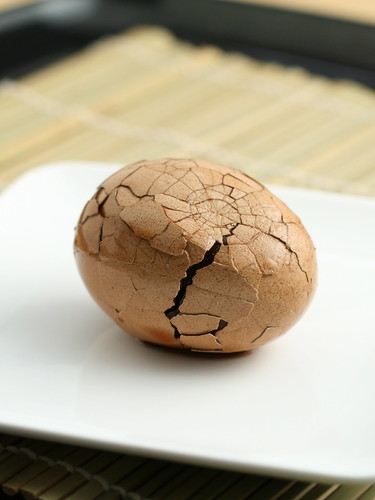
I made a big batch of Chinese tea eggs this weekend because I had way too many eggs in the fridge (always seems to happen after a trip to Costco...). Tea eggs are one of my favorite snacks, a favorite afterschool treat growing up, but they're also good for breakfast, over plain steamed rice (with some of the tea brew on top) or in ramen for lunch. Don't worry, not all on the same day! Damn cholesterol! The best part is the longer they sit in the soy sauce tea brew, the more flavorful they become. I think they taste best after 2 days in the fridge. Oh did I mention, they're really cool looking too?

The tea you use doesn't have to be the best quality, just use black tea and not green. Sometimes when I'm lazy, I just peel the whole egg after hardboiling the first time instead of cracking it. You don't get the pretty design but it's easier to eat later. *nomnomnom* I'm thinking about braising some chicken with my leftover tea brew. Tea braised chicken?

Chinese Tea Egg
Cha Ye Dan/Chinese Tea Leaf Eggs
6 - 8 large eggs
1/4 C soy sauce
2 Tbsp black tea leaves or 2 black tea bags
1 star anise
1 tsp sugar
1/2 tsp salt
Roughly 2 C water

Put the eggs in a saucepan that can fit the eggs snugly and cover with water. Bring to a boil and gently simmer for 7 minutes. Drain the eggs and rinse them with cold water until they have cooled off enough to handle. Use the back of a spoon gently tap the shell all over or just hit them against the countertop.

Return the eggs to the saucepan, add the soy sauce, tea leaves or tea bags, star anise, salt, and enough water to cover. You'll want to use a saucepan that can fit the number of eggs you're cooking perfectly. You don't want to use a saucepan that's too big otherwise, you'll need a lot of water to cover the eggs and it will dilute the tea brew. Simmer them in the tea soy sauce brew for 2 - 3 hours. You can even cook them for a few hours in a slow cooker. Halfway through the cooking time, turn the eggs over, add more water if necessary.

After cooking, store the eggs in the brew at least overnight so the flavors can permeate the eggs completely. I like to cut them in half and spoon a bit of the soy sauce brew onto the yolk before eating, it makes the yolk creamy and more flavorful.

A Healthy Muffin: Whole Grain Almond Poppyseed Muffin

A Healthy Muffin
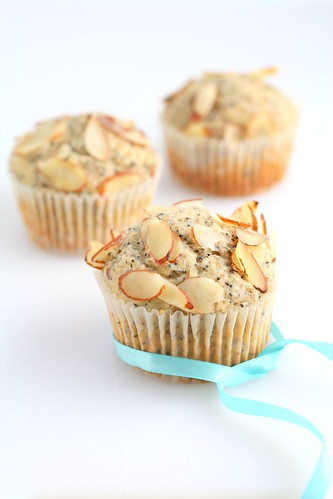
I felt like baking something healthy for a change, or at least try to. I usually sub a little whole wheat flour for all purpose flour when I bake - it may not make a big difference, but it makes me feel better. This time, I wanted to bake something that went a step beyond adding a few scoops of whole wheat flour. I wanted to use healthier fats and sugars too, which sounds a little oxymoronic now that I think about it.

This is the first time I baked without butter and sugar, two ingredients I can’t live without. I’ve never been a fan of butter and sugar substitutes so I used olive oil and agave nectar instead. Olive oil is still oil so the calories are still there but it's high in polyphenols and monounsaturated fats, both of which have heart healthy benefits. Choose a light, fruity olive oil so the flavor will not dominate. In the end, I couldn’t even taste the olive oil flavor in my muffins. I went to my local TJ's and picked up some agave syrup because I've heard how it’s natural and low glycemic. But I dug a little deeper and found some alarming information; while it’s true that agave syrup is low in glucose, which is responsible for it’s low glycemic properties, it is unusually high in fructose and overconsumption of fructose causes even more health problems than glucose. Hmm... maybe this stuff isn’t as good as I thought. The whole wheat flour and ground flax are probably the least controversial healthy ingredients. I think everyone can agree that whole grains and the omega-3s from the flax are good for you.

I’m still looking for a healthy sweetener so this is still a work in progress. Good news is that the muffins taste great, considering how much good-for-you stuff is in them, you’d think they would taste, you know... “healthy.” Granted, it’s hard to beat a Costco almond poppyseed muffin, one of my favorite guilty pleasures, but these muffins didn’t make me feel dirty after I ate one.

Disclaimer: this is the first time I tried to calculate the nutritional info for something homemade and it took way more time than I thought it would. Hopefully I didn’t fudge up my math... No guarantees. ;)
Each muffin has approximately 200 calories, 8 grams of good fat, 12 grams of sugar, 4 grams of protein, 2 grams of fiber (from whole grain sources).

Healthy Whole Grain Almond Poppyseed Muffin
1 C unbleached all purpose flour
1 C whole wheat flour
1/4 C ground flax (store this in an airtight container in the fridge or freezer after opening)
2 Tbsp poppy seeds
2 1/4 tsp baking powder
1/4 tsp salt
1 C low fat buttermilk
1 large egg
6 Tbsp agave nectar or honey *work in progress
6 Tbsp olive oil *choose something light and fruity
2 tsp almond extract

Optional garnish:
Raw sugar
Sliced almonds

Preheat the oven to 350ºF, adjust a rack to the middle position. Line a muffin tin with paper baking cups or spray the tin with nonstick spray.

Whisk all purpose flour, wheat flour, ground flax, poppy seeds, baking powder, and salt in a large mixing bowl and set aside. Whisk egg and nectar until the egg is thoroughly beaten, then add the buttermilk, olive oil, and almond extract until combined.

Add the buttermilk mixture to the flour and fold to combine. There should be no large pockets of flour, a few small streaks are okay. Do not over mix. The batter will be fairly thick.

Divide the batter evenly into the tin, a 1/4 cup ice cream/cookie scoop is best. Optional: top the muffins with a light sprinkling of raw sugar and almond slices. Bake for 20 – 25 minutes at 350 degrees F on the middle rack or until a toothpick inserted in the center comes out clean. Set aside to cool.

Monday, March 2, 2009

Tim Tam Slam

Tim Tam Slam

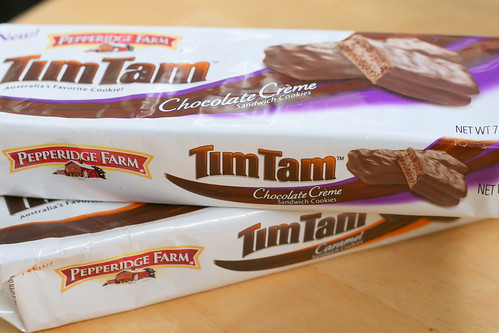
A while back, I was asked if I’d be willing to review Pepperidge Farm’s newly released Tim Tam cookies. A Tim Tam is a sandwich cookie with 2 light and crisp chocolate wafers, chocolate cream filling, and completely covered in chocolate. They're Australia's favorite cookie and haven't been available in the States, until now! I agreed to review them because I've always wanted to try these cookies and do the famous Tim Tam Slam. (And turning down triple chocolatey cookies? I do no such things.) However, I never got the logistics of how to do a Tim Tam Slam - I knew it was something about biting the ends off a cookie and using it as a straw for a hot beverage. Sounds cool. So I looked it up on Youtube, and whadoyaknow, I found a video of Natalie Imbruglia teaching a talk show host how to do a Tim Tam Slam. Perfect! Gotta love the internet.

Tim Tam Slam
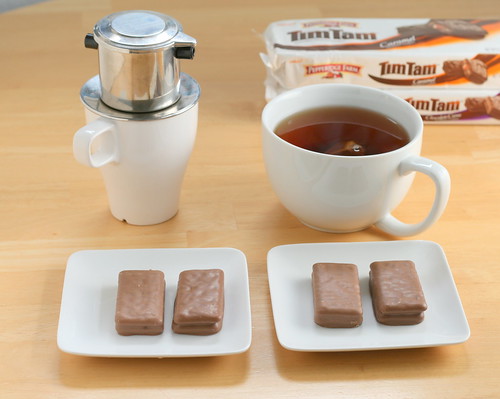
The next morning I made a cup of strong Vietnamese coffee (I looove Trung Nguyen) and black tea and Steven and I did some Tim Tam Slams for breakfast.

Tim Tam Slam
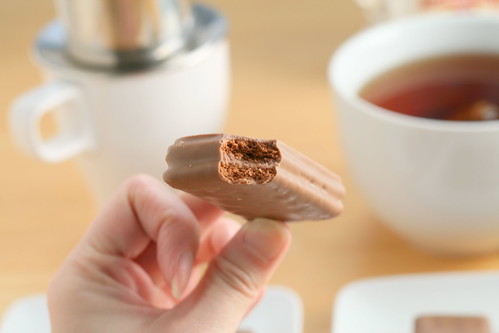
First you bite a little corner of the cookies diagonally like so. Then you dip the cookie in the beverage and suck until you can feel the drink in your mouth and quickly eat the whole cookie. Don’t try to bite the cookie in half (I made this mistake) because it will squirt and fall apart so just eat the whole thing in one big bite. And you have to do this quickly otherwise the chocolate coating will melt and the cookie will fall apart as you're holding it.

I think it’s traditional to do the slam with tea but being partial to coffee myself, I much preferred the combination of strong coffee and chocolate. I also tried it with some cold milk because I thought cookies and milk was always a delicious combo but not in this case. The cold milk made the chocolate exterior cold and waxy and the cookie just didn’t taste right filled with cold milk - pretty gross actually. A hot beverage is definitely the way to go because the chocolate shell gets gooey and the insides are warm and melty. Mmm...! I really liked the caramel center in the caramel Tim Tam but the chewiness distracted from the overall soft gooey interior when you're doing the Tim Tam Slam, whereas the chocolate cream variety resulted in a uniformly soft and gooey cookie.

My conclusion? The Tim Tam Slam is a transcendent experience that everyone needs to experience. I would definitely urge people to try both kinds and see which you prefer. The only downside? Two cookies are 25% of your daily saturated fat! Ouch! I dunno what kind of magical ingredients they put in these to make them so damn tasty but it ain’t good for you that’s for sure. Another bummer is that these cookies are only available for a limited time in Target. You can get a $1 off coupon at http://www.ilovetimtamcookies.com/index.html. You need to do a Tim Tam Slam ASAP, you'll be glad you did.

Tim Tams

Disclaimer and other ramblings:
While I love these cookies, they're a bit pricey. My local Target carries them for $3.34 for a 7oz. box. I think I will still get a few more boxes for the occasional treat because they are tasty. Now as for the other Pepperidge Farm stuff, I only buy Pirouettes, which are my favorite holiday treat. Pepperidge Farm stuff overall is usually on the expensive side. I've heard that Milanos are noticeably smaller nowadays, which is very disappointing, but I guess what brand hasn't been cutting back on costs with the economy being like this. Pirouettes are tasty except the Cappuccino flavor, which is horrendously disgusting. Being a coffee lover, I was obviously drawn to this flavor. I made the mistake of getting two tins and I hate them. They taste overwhelmingly of cinnamon and when I looked at the ingredient list, cinnamon shows up before coffee flavoring! I have never ever put cinnamon in my coffee, and I wonder who does?! Ugh, so gross!