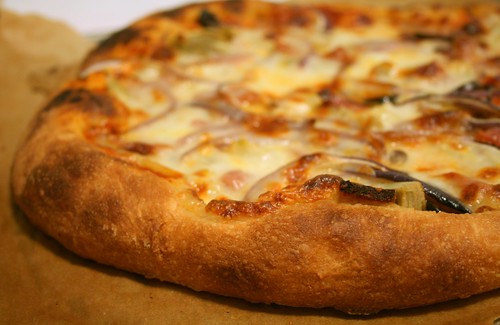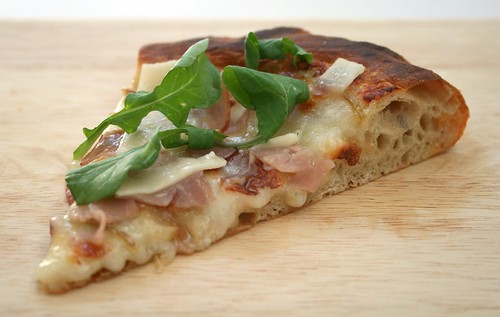
I used to hate pizza crust as a kid. I would dread getting to that barren outer ring of crust where there was no more sauce, cheese, or pepperoni to hide the dry and tasteless breadstick. As I got older, I realized the world of pizza extends beyond school cafeterias and nationwide pizza chains. I discovered specialty pizzas, where the crust is the best part! My attempts to make pizza at home never got very far until I got a baking stone about a year and a half ago. The baking stone transformed a flabby, limp crust into a crisp one. But the most important element of great pizza is the dough, and it is also the trickiest part. My idea of the perfect pizza crust is one that's crisp on the outside and has a good chew on the inside. The crust should be thin except around the edge where there should be big, bulbous air pockets. Oh how I love those giant air bubbles. I've made some pretty good doughs but I still wasn't satisfied. Then I had a stroke of genius. Why not use no knead bread for pizza dough. The high water content in the dough will create that really crisp crust and the long rise time means plenty of gluten development for the chewy interior and lots of good air bubbles, just what I was looking for. I started experimenting with this idea a few months ago. But as it turns out I wasn't the only one with this idea (a whole book

mmm... look at that bubbly crumb
This is the original No Knead Bread Recipe:
3 C flour
1 1/2 C water
1/4 tsp instant yeast
1 1/4 tsp salt
For no knead bread, I use unbleached all purpose flour and that gets the job done. But for pizza dough, I want a really chewy finished product so I use bread flour, which has more gluten. Usually when I make No Knead Bread, I use a combination of 2 cups all purpose flour and 1 cup of white whole wheat flour (I like King Arthur Mills). Whole wheat flour is more flavorful to begin with (it's healthier too!) and the extra long rise and fermentation really brings out even more flavor. I wanted my pizza dough to benefit from the flavor boost of WW flour so I kept this ratio for the dough: 2 cups of bread flour (again I like King Arthur Mills) and 1 cup of white whole wheat flour.
I kept the water content the same, preserving the 2:1 flour to water ratio.
And I also kept the yeast amount the same.
The salt content of the original recipe fits my tastes perfectly. Because I would be adding sauce and toppings, I scaled it down a bit to 1 teaspoon. This also makes it easier to halve or double the recipe.
Now for some pizza dough additions:
I'm not sure if anyone else experiences this but it seems like No Knead Bread goes stale really quickly. After half a day the crumb, once moist and delicious, gets a little crumbly and funky (though a little toasting in the oven reverses the staling). I like to add olive oil to my pizza doughs, which adds a great flavor but also improves the texture and the additional fat protects against staling. I like to add 1 tablespoon for every cup of flour, which is a little more than most recipes, so in goes 3 tablespoons of olive oil.
Next I also like to add honey, which helps boosts the flavor of the dough and works especially well with the whole wheat flour. 1 teaspoon for every cup of flour, 1 tablespoon total but you can go up to 2 tablespoons.
So here's my final recipe:
No Knead Pizza Dough
adapted from Jim Lahey's No Knead Bread
makes 2 medium sized pizzas
2 C bread flour
1 C whole wheat flour, preferably white
1 1/2 C water, warm about 100 degrees F
1/4 tsp instant yeast
1 tsp salt (if you use kosher salt you will have to use more)
3 Tbsp olive oil
1 - 2 Tbsp honey
Dissolve the honey in the warm water. The water should feel tepid and slightly warm to the touch but not hot; hot water will kill the yeast. Whisk together the flour, yeast, and salt to evenly distribute. Add the warm water and olive oil and stir until the dough is well mixed. Cover the bowl with plastic wrap and let it rise at room temperature (optimal temp about 70 degrees) for 18 hours.
I made 1.5x the recipe and it looked like it was going to take over my kitchen.
No knead bread rises anywhere from 12 to 18 hours for the first rise, and then 1 - 2 for the second rise. For this pizza dough, I like to go for the full 18 hours to get maximum flavor and gluten development, then I let it rise for 2 - 3 hours for the second rise. Typically when I want to make pizzas for dinner, I start the dough the previous day at around 10pm. Then it let it rise all night and during the day when I'm at work. I get home at around 4pm when I shape it, then let it rise again until 7pm and then pizzas are done by 7:30, just in time for dinner. (If this time frame doesn't work for you, see my note about retarding the dough)
After 18 hours, flour your work surface, hands, and a bench scraper. Cut the dough in half. Handle the dough gently because if you're too rough, you will push all the hard earned air bubbles out of the dough. Gather all of the edges of the dough together, almost like a little pouch, and seal the seams. You will have a ball of dough. Brush any excess flour off your work surface to the side. You don't want too much flour on your surface for this step. Flip the ball of dough over so the seam is on the bottom. Flour your hands and lightly flour the sides of the dough. Then cup your hands, and shuffle the ball of dough back and forth between your hands in a circular motion. The bottom of the dough will grab onto the work surface and the circular motion will help the exterior of the dough pull taut and form a smooth surface. If there is too much flour on your work surface the dough will not be able to grab onto the work surface. Repeat this process with the second portion of dough. After you have formed the ball of dough, use a bench scraper to lift it off the work surface since it will be stuck, and transfer it to a floured area to rest. Loosely cover the dough with plastic wrap and let it rise again for 2 - 3 hours.
Take this time to make your pizza sauce and prep your toppings.
Adjust an oven rack to the lowest position, set the pizza stone on the rack, and preheat the oven to 500 degrees F or as high as your oven will go and preheat for 30 minutes before baking. Do not add a pizza stone to a hot oven or it will crack. Place the stone in the cool oven before you turn it on and then let it heat up with the oven.
If you don't have a pizza peel, like me, you can use a cookie sheet with no lip. I place a square piece of parchment directly on the cookie sheet and form the pizza on the parchment. This way I don't have to deal with scattering cornmeal on the cookie sheet which always makes a big a mess and ends up all over my kitchen floor.
When it's time to stretch your dough, oil your hands front and back. The oil will prevent the dough from sticking to your hands and it will also get rubbed onto the exterior of the dough creating a nice crispy crust. Take one ball of dough and gently flatten it. Form two fists and drape the dough over your fists. Let gravity pull the dough down as you turn it over your fists. Once you get a rough circular dough, place it over your piece of parchment. Even out the dough with the heel of your palm, make sure to not thin it out too much otherwise the dough will tear. Top with sauce and toppings but don't overwhelm the dough with too much stuff or it will get soggy.
Take the cookie sheet or pizza peel and slide the pizza with the parchment paper onto the baking stone. Bake the pizza for 7 - 10 minutes or until the crust is a crisp and golden brown and the cheese is spotty brown. After 5 minutes the bottom of the pizza will be baked and you can slide the piece of pachment out from underneath. This way the crust will be in direct contact with the stone and will crisp up better.
After the pizza has finished baked, take your pizza peel or cookie sheet and slide it underneath the pizza or use a pair of tongs and gently grab the crust and pull the pizza onto the peel/sheet.
Cool for 5 minutes before cutting and serving.
*note:
Not everyone has the option of getting home at 4pm from work so if you want to make this on a weeknight, one possibility (I have not tried this yet however) is to refrigerate the dough after shaping but before the second rise. You will also need to start the first rise earlier around 5 - 6pm and let it rise until the next morning and then shape it for the second rise, cover well and refrigerate. The cooler temperatures will retard the dough and it will continue to rise at a much slower pace. You can shape it early in the morning, retard during the day, and take it out 30 minutes in advance to let it come to room temperature, cold dough will tear too easily.
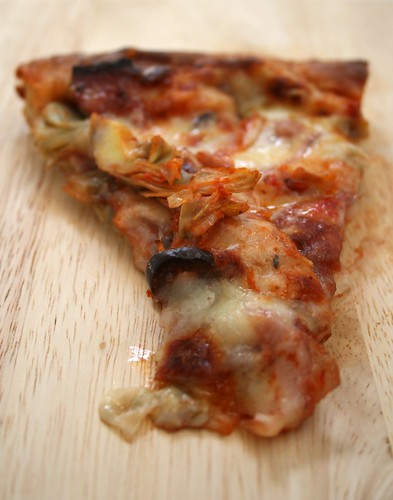
Salami, kalamata olives, and artichoke hearts. nomnomnom!
Simple Tomato Sauce
1 28 oz can whole tomatoes, packed in juice
2 Tbsp olive oil
3 cloves of garlic, minced
Salt and pepper
Fresh basil, chiffonade or torn into smaller pieces (if you have it)
Drain the tomatoes and puree them in a food processor or food mill. Add the garlic and olive oil to a cold unheated saucepan and place over medium heat. Let the mixture slowly heat up together. When the garlic starts to smell fragrant, add the tomato puree. Cook until it has thickened. Season with salt and pepper. Off heat stir in the basil.
A final note: I love making my pizzas with fresh mozzarella. If you have access to a Trader Joe's, they sell 1 pound logs of fresh mozzarella for only $5.


Yumm! Those look delicious, especially that simple-looking onion pizza at the beginning! I have pizza on my dinner agenda tonight, but alas, will just be using store-bought dough. wish i had as much conviction as yours to bake it from scratch. Looks amazing!
ReplyDelete- Meena (http://www.hookedonheat.com/)
I'm making pizza tomorrow, so I don't have time for this one, but I'm bookmarking the recipe for next time. Great picture!
ReplyDeleteFabulous idea! How did we ever survive without No-Knead Bread! Your pizza looks totally delicious. I'm really psyched to try this!
ReplyDeleteWow, that looks great! I was a big devotee of Lahey's bread until I started making the "five minutes a day" kind, which I think could also be adapted for pizza (actually I know it can, but I haven't gotten the book yet).
ReplyDeleteOne thing I do like about it is the flavor the dough develops if you leave it in the fridge for more than a week. I'll have to take your notes and try tweaking it for pizza myself. Once I get a pizza stone.
Thanks for the great post!
Awesome! I've yet to make a pizza dough I'm happy with. I'll have to give this a try next time.
ReplyDeleteThe last time I made no-knead dough, we ate the bread right away. Would I have the discipline to make just one pizza??? I don't know! Yours look divine.
ReplyDeleteLove the preparation tips, that are geared towards those of us who work. I usually only make pizza in the weekend, due to the proofing time needed for the pizza dough.
ReplyDeleteI agree this does sound delicous..and no knead sounds great too. You may have come across the perfect dough:D
ReplyDeleteWow, that's a great pizza! Very appetizing and beautiful! The crust looks delicious...
ReplyDeleteCheers,
Rosa
Good idea, a no knead dough!!
ReplyDeleteI was learning to bake bread from a friend. After kneading for over an hour and my bread dough didn't turn out well! But my arms almost came off!!! No more kneading for me, that's for sure!!
But now with the good news from you on "no knead" bread dough, hallelujah!!!! I can try to bake bread again!
J.C. of Subang Jaya Daily Photo
Amy, I'm a crust girl! I love it and will eat it all, and then Joao's, too. :)
ReplyDeleteThis pizza looks superb!
Looks like you made some great modifications. Love that it's thick... I'm a crust gal.
ReplyDeleteThose pizzas look really good! Making your own is always fun.
ReplyDeletethat looks amazing. do you think you could make individual pizza crusts and freeze them?
ReplyDeleteNo kneading? But what about breaking a good sweat and building up the biceps? ;)
ReplyDeleteIt looks awesome, Amy.
"Then cup your hands, and shuffle the ball of dough back and forth between your hands in a circular motion. The bottom of the dough will grab onto the work surface and the circular motion will help the exterior of the dough pull taut and form a smooth surface. If there is too much flour on your work surface the dough will not be able to grab onto the work surface."
ReplyDeleteI'm having a lot of trouble visualizing this process. Could you describe it in further detail or point a link with a longer description / pictures ?
Leio,
ReplyDeleteThe ball of dough will be on your work surface. With your left hand cup it around the side of the ball of dough. Your right hand should be about 2 - 3 inches away from the ball of dough. Then move the dough between your two hand while moving in a circle around your work surface.
If that doesn't help I'll try to take some pictures of the process.
That helps a bit, but pictures would be fantastic! I'd like to try to replicate what you've done. You seem to have had the best results with Lahey's no knead recipe from what I can tell.
ReplyDeleteThanks!
I've been fooling around with homemade pizza for awhile now, but after finding this recipe, I don't fool around any more, I make it this way. This is hands down the best pizza recipe I've come across. There are a couple of very good ideas in here, like using parchment paper in lieu of corn meal and oiling your hands instead of flouring them, that are just genius (why didn't I think of that?) The combination of bread and white whole wheat flour is fantastic. To anyone looking to make this, the WWW flour is worth seeking out if your primary grocery store doesn't carry it, it makes a huge difference. The recipe is complete and clear obviously well thought out. This recipe makes a pizza crust as good as any I have ever had.
ReplyDelete